From an Unreal festival experiment to an autonomous Unity VJ system
Twelve Think-Make-Check cycles: five weeks building a music-festival visualizer in Unreal, then seven cycles building a Unity + ShowBrain system a small venue can run, through to a live-mic test that put the file-tuned loudness handling under a hot room for the first time.
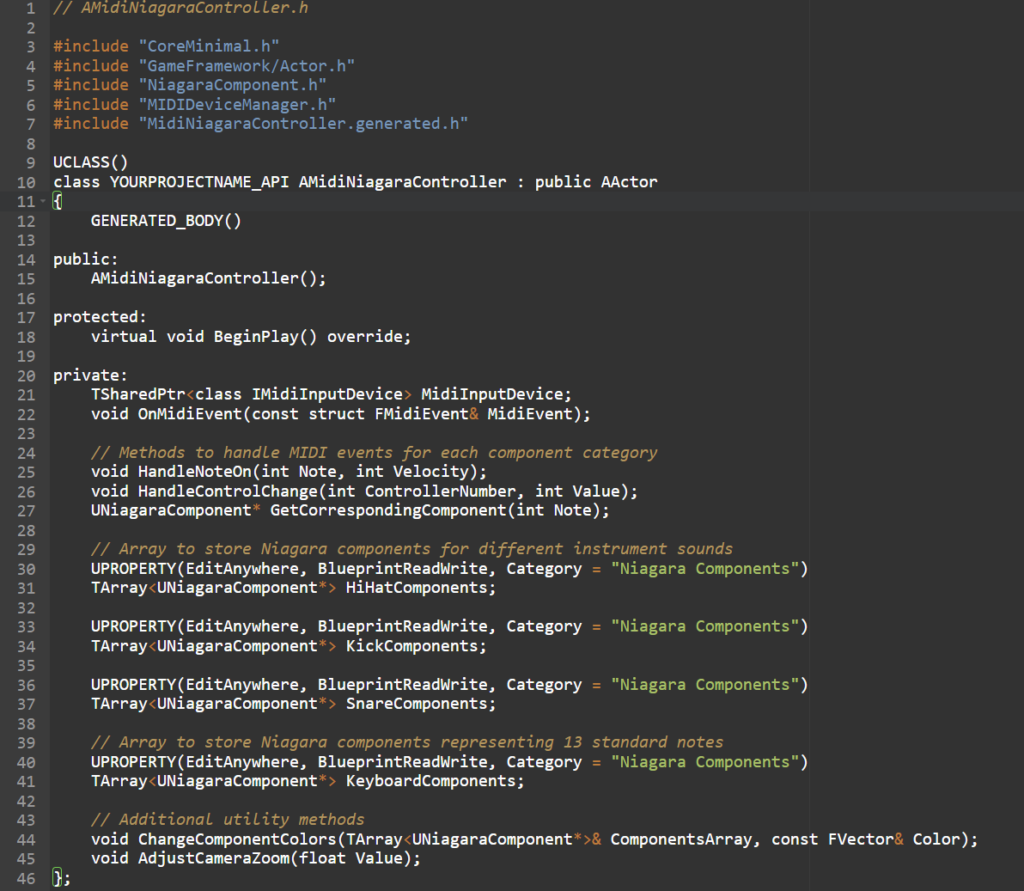
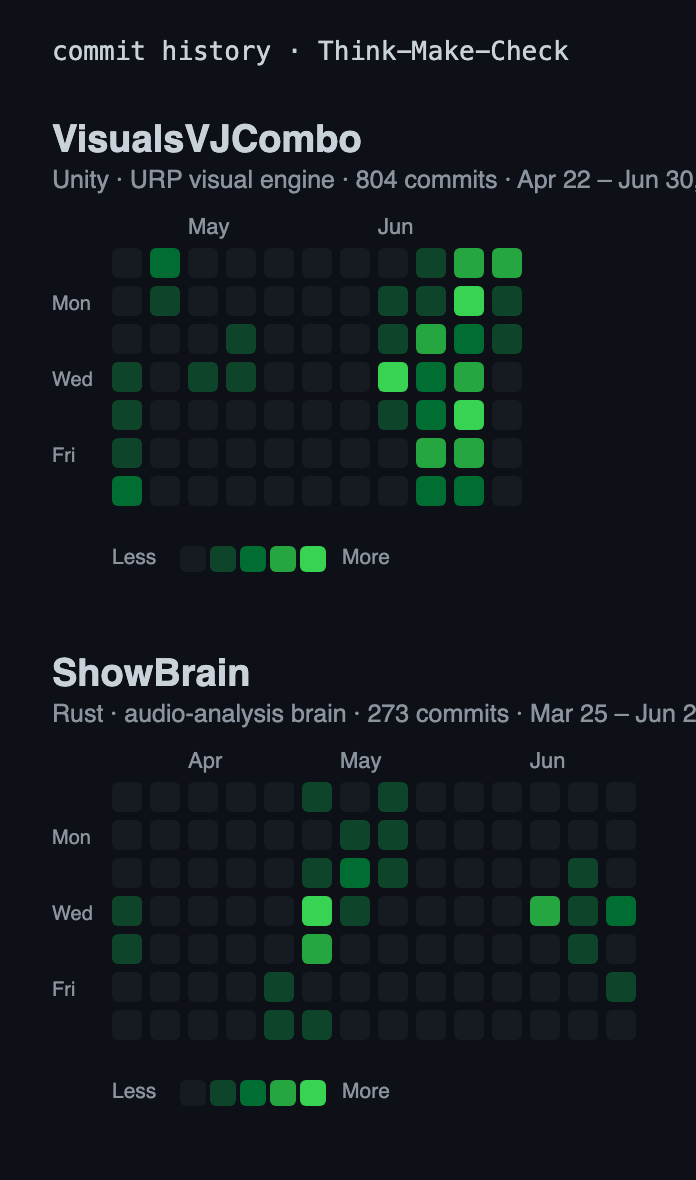
Author Victor De Roy van Zuydewijn · Gameplay Engineering Arc Unreal Engine 5 / Niagara → Unity URP · ShowBrain (Rust audio analysis / OSC) · Spout → Resolume Evidence the original Unreal article + 804 Unity commits + 273 ShowBrain commits + a VJ interview, a VJ atlas review, and a live-mic field test Demolive reactivity reel, 24 visuals reacting across six genres on one clock (local link for now, swap for a hosted URL before publishing)
The question that kept changing
This project started as a creative-technical question: how can interactive art with shaders and procedural content make a music festival feel more alive? I didn't set out to build for venues. A single conversation in Week 5, a working VJ, ten years in, is what moved the question to a market one: how can an autonomous audio-reactive system give a small venue useful, coherent live visuals without a dedicated VJ or an expensive rendering PC?
The method throughout was Think-Make-Check: decide what to prove, build the smallest thing that proves it, then check it against rendered output and against real people. Early on that meant friends and classmates. Once the Unity system was real, I kept going back to the same small group: working VJs in my network, my partner, a live light and audio technician who runs sound and lighting at parties, and, when a cycle was ready for it, a few venue contacts. Each caught a different thing, the VJs whether it read and held up on a deck, my partner whether the audio was honest and sat inside a room's real levels and lighting, the venues whether they'd switch it on.
One caveat on the feedback below: some I kept on file, some I'm quoting from memory, offhand comments that moved a decision but that I didn't always write down at the time.
The first five cycles are my original Unreal article, kept faithful. That's where the audio-reactivity instincts and the VJ contacts came from. The second seven are a separate, later project, the Unity + ShowBrain system, which I only picked up after spending real time in the scene and playing several paid VJ gigs myself. It's genuinely a new project, not a continuation of the school one, but it carries the learnings from the Unreal work and ends with a first live-mic test in a room. In those cycles I kept the audio and the visuals together on purpose, since the audio tool and the Unity visuals changed in lockstep, so I describe them together. Online research shaped concrete choices where it bit: it's where the eight-band spectrum idea behind ShowBrain's band model came from, and where the case for writing ShowBrain's live engine in Rust got made.
Part One
The Unreal precedent: five weeks
My original GameLab article, reproduced faithfully: a music-festival visualizer in Unreal Engine 5, Niagara and PCG, told week by week. Audio just multiplied particle velocity, but the scope lessons and a single VJ interview reframed everything that came after.
Introduction
Hello everybody! I'm going to dive deep into music visualizations for festivals. As you might know these are very graphically complicated, with visual effects like shaders and use of PCG.
My original concept: I started off with a vision for music visualizations for festivals. My original idea was a water/lava visualization that is supposed to look realistic but also abstract. Another idea was a space theme. After doing research on existing concepts for huge festivals and artists, I noticed there were a lot of concepts I hadn't thought of before, which is why I decided to make a large drawing board with all kinds of examples, so I can easily look at everything I like and combine or extract certain principles. This is also a common practice for movies or art styles.
To start, having a clear overview of everything that needs to be done felt important. But as Unreal, shaders and PCG were all very new to me, and the goal of a music visualizer was new too, I had to research the steps first and adjust along the way. For my first sprint I focused on asking the right research questions, but doing only research for a week risks waiting too long to actually make something, so I decided to follow a quickstart tutorial for Unreal and research the Unity-vs-Unreal differences along the way.
Research questions
Difference between Unity and Unreal, C++ vs C#?
Difference between shaders in Unity and Unreal?
Difference between the render pipelines, Unity vs Unreal?
The role of Blender for combining with Unreal.
How do others extract audio data for visualizations, both video visualizations and more advanced festival visualizations?
Unique visualizations, like making it appear outside of a screen or projecting onto a 3D box.
Cycle 1 · Week 1: Creating an audio visualization with Niagara
Week 1 · Think, Make, Check
Music festivals provide a captivating experience by combining visual elements into an unforgettable atmosphere. This week starts my journey learning Unreal Engine, something I'd wanted to do for a long time, now that I can finally dedicate 40 hours a week to it. I first had to think: what do I want to create? I'd really enjoyed the PCG and shader assignments during the bootcamp, and I've always been interested in abstract art and audio visualization, so that's how this project came to be. In this report I go through the steps I took, the research involved, and the Think-Make-Check cycles that made me rethink my approach based on feedback from my guild, VJs and graphic artists, and user tests.
Think
Establishing quality criteria
Prior to starting the project I had a vision of what I aimed to accomplish:
Creating audio-driven movement.
Incorporating appealing particles / shaders and other effects.
Synchronizing effects / shaders with the audio.
Developing a music visualizer suitable for festivals (this aspect was only partially achieved this week).
Research and exploration
It became clear from research that Unreal is an up-and-coming tool for music visualisations that more and more experts are beginning to use. The most common software is TouchDesigner, but that offers less customization, though it is more accessible for beginners and non-programmers. To fill my knowledge gaps in Unreal I invested two days in a beginners' course on Udemy. That foundational course proved invaluable, because Unreal is different from Unity in a lot of ways. Equipped with that, I turned to Sem Schreuder's guide on synchronizing visuals with audio in Unreal Engine, which explored how to create visualizations using the Niagara system.
Design plan
Start by building upon the knowledge gained from the CoreGames project.
Integrate audio input and synchronize it with the visual elements.
Optimize for performance.
Address any compatibility issues that may arise with versions of Unreal.
Make
Execution based on the CoreGames foundation
Taking inspiration from the CoreGames work, I enhanced and customized the project further. Instead of the default sprite rendering I introduced a mesh, a cube, and by adjusting particle size and increasing spawn rate my aim was a densely packed particle effect.
Appearance and movement of particles
To control particle movement I incorporated a curl-noise force while tuning parameters such as noise strength and frequency. I also set the mesh renderer's facing mode to velocity so the cubes automatically rotate, resulting in a very modest movement and visualisation for now.
Integration of audio
The core of the project was integrating the audio module. For this I developed a Niagara module script specifically for audio visualization. Its input parameters included audio-spectrum analysis data, normalized age, and velocity values. The velocity was multiplied by the audio amplitude, with a multiplication factor I adjusted to get the desired effect. I used the default master submix to capture all audio from Unreal Engine.
During development I ran into challenges. Unreal's environment differs from Unity's, so I had to iterate and address issues like performance, for example decreasing the water quality from 256 to 64 to find a good value, and tuning the integration so the visuals synchronized with the beats. Optimizing performance was a significant challenge in itself: as the visualizer became more complex, keeping it performant mattered more. Navigating between versions of Unreal added its own set of problems, since some tutorials were built on earlier versions and caused compatibility and functionality issues.
During evaluation it was essential to distinguish between preferences and objective results. Although I wanted to focus on the best possible visual effects, I relied on technical metrics and feedback, like fps and lag spikes, to measure performance. The choice of a certain kind of effect directly influences the performance of the visualizer, for example prettier or larger particle systems looked impressive but often required additional computational resources, which posed performance difficulties.
Water
Check
Assessing if the outcome meets the set standards
The visualizations underwent exploratory testing with friends, family and other students. Most met three of four predetermined criteria, with the water theme emerging as the favourite, though the realistic water-like visualizer was only partially realized, leaving room to develop the music synchronization.
Criteria
User Experience (UX) quality: observe whether users find the visualizations captivating and can navigate and interact with ease.
Synchronization with music: ensure visual effects are precisely timed with the beats and rhythms for a coherent audio-visual experience.
Performance and reliability: monitor for low latency and high stability to avoid disruptions during live performance.
Aesthetic and design quality: evaluate the visual attractiveness and customization options to match a festival's vibe and audience.
Incorporating feedback from the community. The input from friends and family was invaluable, shedding light on where performance and visuals could be improved, and it was integrated into the project to raise its quality and user-friendliness (fps, visibility). Assessing on technical criteria. The visuals also went through visual inspection for performance, appeal and audio synchronization, with specific test criteria around particle density, accuracy of synchronization with cues, and frame rates across environments.
Conclusion
After a week on the music visualizer I've created the start of something that could enhance a music festival. The journey involved research, experimentation and collaboration with the community, and it reminds me of Unreal's possibilities and fills me with excitement for future improvements, because right now it is still very basic.
Cycle 2 · Week 2: Environment theme, genre & dynamic camera control
Week 2 · TMC R&D
Think
After the Week-1 feedback that I should pick a theme, I researched common festival themes, gladiators, nature, gore, and set on constructing a visual environment that seamlessly blends with the musical journey, transitioning from a tranquil nature scene intuitively into a vibrant sci-fi arena, enriched with more advanced visual effects as the musical intensity escalates. I started by imagining that journey from calm and natural to lively and sci-fi, thinking about how the visuals and music could work together, and I created the first version of a mood board while trying to think of good ways to implement it fully.
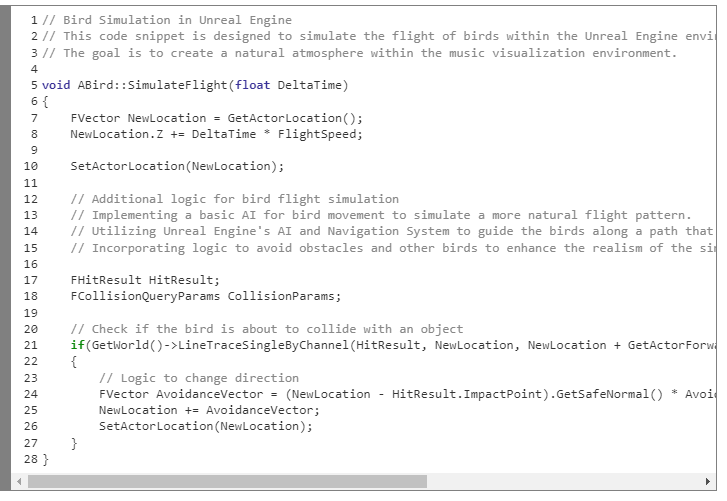
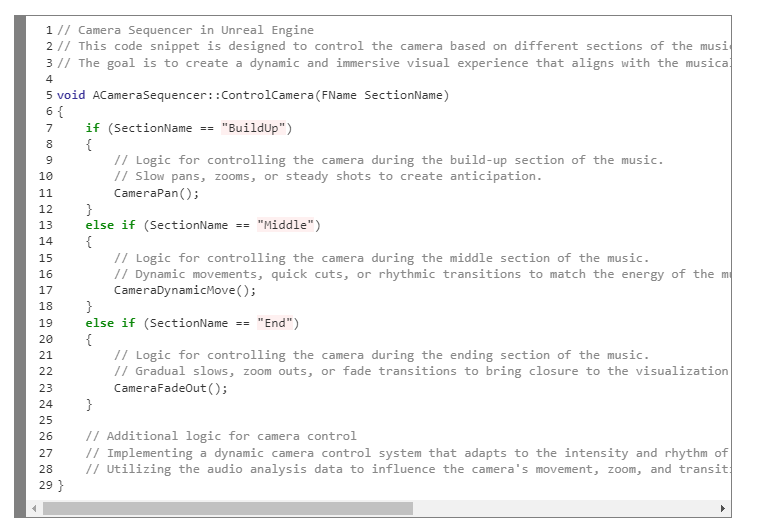
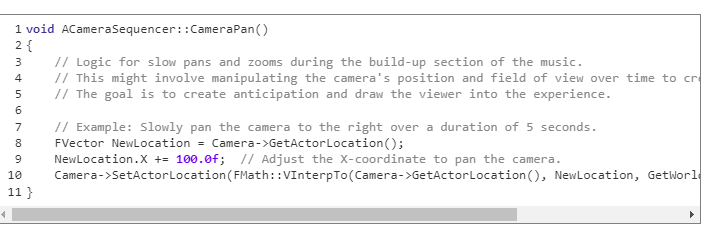
In the initial stages I integrated bird simulations for a natural atmosphere. Synchronizing their movement with the music is possible, but I kept it simple for now and focused on refining the core visualization already in place. Then I began exploring the camera sequencer in Unreal. Unlike my first prototype, which used a standard player camera, I recognized that an authentic music festival visualization might benefit more from a musically-responsive camera. That led to a sequencer orchestrating distinct segments for different parts of the music, the build-up, the middle and the ending. These segments are static for now, but they could be uniquely crafted per song later, or activated live by a VJ the way they often are at festivals.
An image of the sequencer I worked on, where I focused on matching it to the music.
For the meticulous tweaking of the effects, and pinpointing the exact musical sound I wanted to visualize, I created a direct audio connection from my PC into the Unreal application. That streamlined testing a lot, letting me explore songs, styles and effects easily before committing to a genre. After discussing and reviewing my 14-page mood board with my colleagues, I decided on the thematic environment and effects; the final music style became clearer, leaning toward a kind of EDM, though not yet set in stone.
The first version of the mood board, while trying to think of good ways to implement this fully.
Make
Next I added birds to sell the nature scene and used the camera tool in Unreal to give different views of the music's parts (start, middle, end). I connected my PC audio to Unreal to easily try out songs and effects, which meant a lot of testing across multiple music styles and settings for the visualizer. After tweaking, a lot has changed even if it isn't easily visible from stills: the total spread of the particles was decreased, except when the beat feels like it's in slow motion, then the spread is increased; and the way the audio-spectrum data manipulated velocity and distance was tweaked to read more clearly from close by.
Deep dive into technical implementation
1. Bird flight simulation. Bird flight was implemented to enhance the natural atmosphere. The birds' movement was tied to the music, aiming for a seamless blend between the visual and auditory experience.
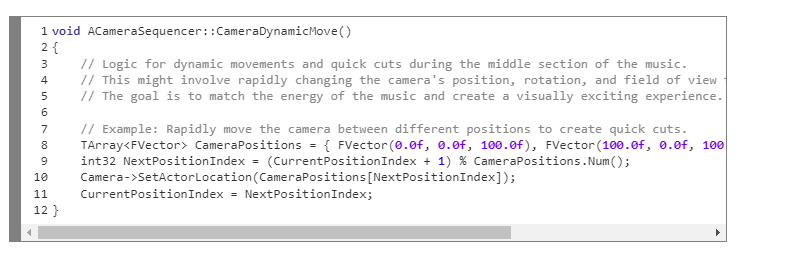
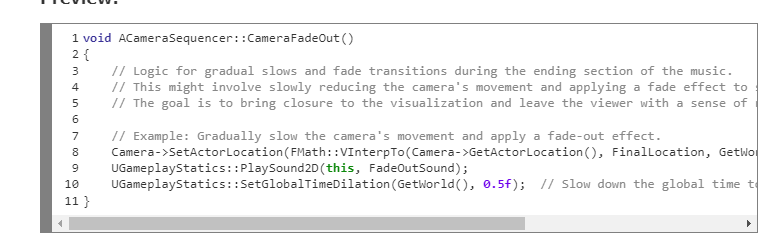
2. Dynamic camera control logic. The camera control logic is pivotal for a dynamic, immersive experience that aligns with the musical journey. The detailed camera movements are activated through code:
Build-up section: slow pans and zooms.
Middle section: dynamic movements and quick cuts.
End section: gradual slows and fade transitions.
Check
Lastly I talked with my team after showing them the mood board, to make sure the theme and the future effects fit my first and future ideas.
Conclusion
Through meticulous tweaking and pinpointing the exact musical sound to visualize, a thematic environment was crafted, ensuring a seamless blend between the visual and auditory experience. The journey from conceptualization through technical implementation to refinement was navigated with a lot of research and discussion with peers, ensuring a visually and audibly harmonious experience. But this is just a starting point of the musical journey: by adding more environments and more visual effects, it will be able to transition between multiple themes. Giving the birds colours, or changing how they fly when the music hits, could create a realistic effect where the birds either dance to the music or get "blown away" by the sound waves like wind. I'm really curious what my guild suggests, and after this I'm hoping to move forward with FMOD and other more advanced visualization and audio techniques.
During Week 3 I refocused on Niagara VFX and made clearer progress toward captivating visualizations for music festivals. Taking the Week-2 feedback of wanting to see cooler effects, I dove back into the Unreal Niagara system, and by combining Niagara's power with past insights I crafted a visualisation with a lot more interesting Niagara effects, which do not react to music yet, but I first want to ask for feedback on which effects I should make react to music live.
Exploring the depths of Niagara
Building on the Week-2 feedback I went deeper into Niagara, Unreal's visual-effects editor. Its modular nature lets me achieve behaviours in different ways, and by just tweaking a few variables the entire visualisation might change. Incorporating the feedback drove me toward a more immersive, dynamic representation.
Make
Creating a new narrative: an epic musical adventure
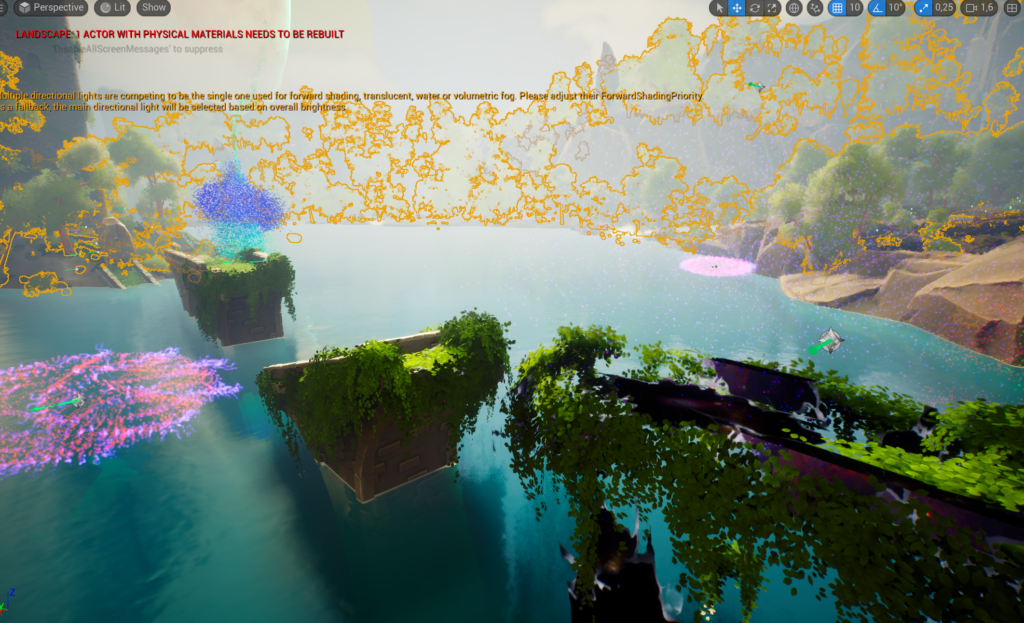
a. Nature, the beginning. I used the Week-2 feedback to enhance nature as the prologue of the story, adding foliage, water effects and atmospheric changes that look a little out of place for now but will read better once they react to music and lead into the next environment (probably space).
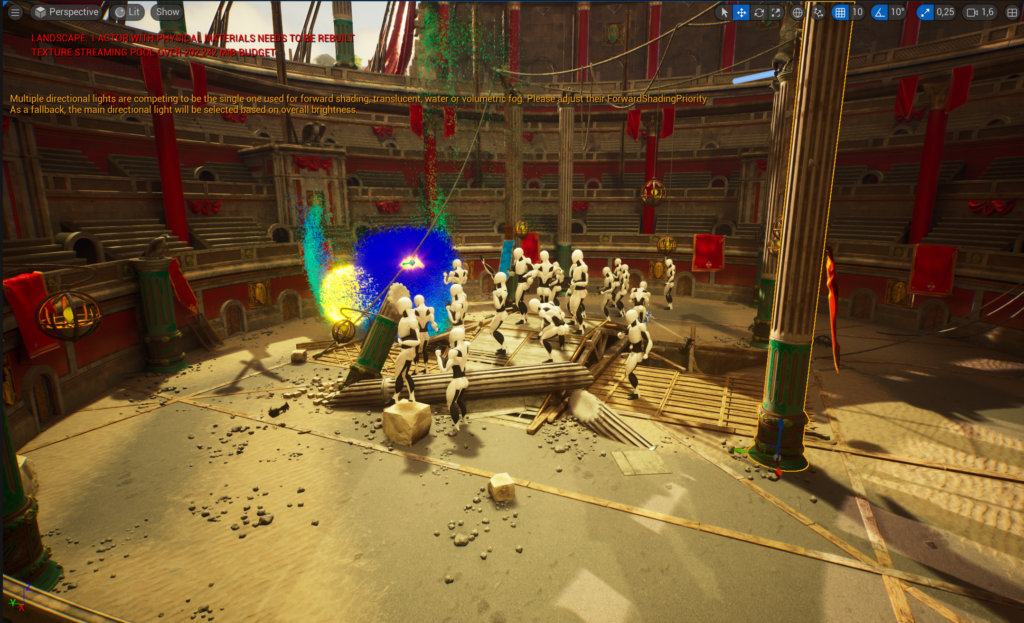
b. Gladiator arena, reaching a climax. The gladiator arena holds significance in the narrative and was refined from the Week-2 feedback; it now serves as a tribute to the festival theme. I also made the transition smoother with cues to guide the audience.
Here is an example of the space flower/hole next to the bridge, built with multiple forces like a curl-noise force, but also a vortex velocity, a very important detail that creates the swirl/vortex effect.
c. Magic / space, the enchanting finale. The Week-2 feedback also refined the portrayal of the universe, so it captured the timeless essence of music.
Addressing feedback and implementations
Interaction between visual elements: I explored how the visuals interact with the music even before being directly audio-driven, and want NPC behaviours to reflect beats later for a heightened sense of realism.
Shader / visual effects: I experimented with shader particles and effects for a layered look, including more advanced effects like transparency and glow that can later be tweaked to the music.
Versatility in musical styles: while focused on an EDM style and build-up, I implemented flexibility for other styles later by exposing user variables for frequency and velocity.
Check
Think-Make-Check summary
I refined the criteria based on Week-2 feedback, incorporated expert advice on particles, shaders and transparency, and kept engaging the community for input on visuals and narrative. During development I introduced a range of particles, the black "wormhole ball", ambient effects and celestial spheres, and used a bird model to help scene transitions. To refine the narrative I built transitions to shift from nature to gladiator to space, complemented by tailored effects like the portal for depth and cohesion. In the feedback analysis I differentiated subjective insights from Week 2 and cross-checked the visuals against the criteria so they aligned with the music. Peers gave detailed feedback and "feedforward" on which effects to make audio-reactive next.
Conclusion
Week 3 was a turning point: I broadened my range of effects and laid a solid groundwork for future integrations, pushing past what I'd done before with Niagara. At this stage the cooler, working audio-reactive effect is still a work in progress, I'm fine-tuning how it weaves into the existing effects with a clear theme and storyboard, and a big part of the week went into the design and narrative so that once the music is added the result is a seamless blend of sight and sound. As I said painfully to myself the next week: I had over-built.
Niagara references included CGHOW and Mr.Hollt tutorials on the Niagara particle system.
Cycle 4 · Week 4: Refocus to a clear, well-thought-out visual narrative
Week 4 · insights from user testing
Think
After looking over the grade and feedback from Week 3, it was clear I might have gone a little overboard with all the cool creative possibilities Niagara had to offer. The feedback hit home: I needed to narrow my focus and set a clear direction. Up to that point I'd been experimenting with a bunch of effects that didn't fit the scene properly yet and weren't reacting to the music as planned. So I hit the books and the forums for a game plan with two purposes: get better at Unreal's other features beyond Niagara, and make an actually good music visualization. The plan was to put a pin in the random effects and concentrate on a cohesive goal, which meant going deeper into Unreal's toolkit, camera moves, blueprints, C++, the UI, and the lighting. Taking this route felt iffy at times, it's tough to push aside the immediate wow-factor of effects for the steady progress of honing your skills and building a story, but from the other side I can see it was the right move.
Make
Diving into Unreal Engine
My initial encounters with Unreal were challenging; as a beginner the complexity was immediately apparent. The camera sequencer, essential for syncing visuals with the music's rhythm, demanded precise control and cinematic technique I had yet to master, and alone required hours of experimentation and scene rendering to produce the seamless outcome I envisioned.
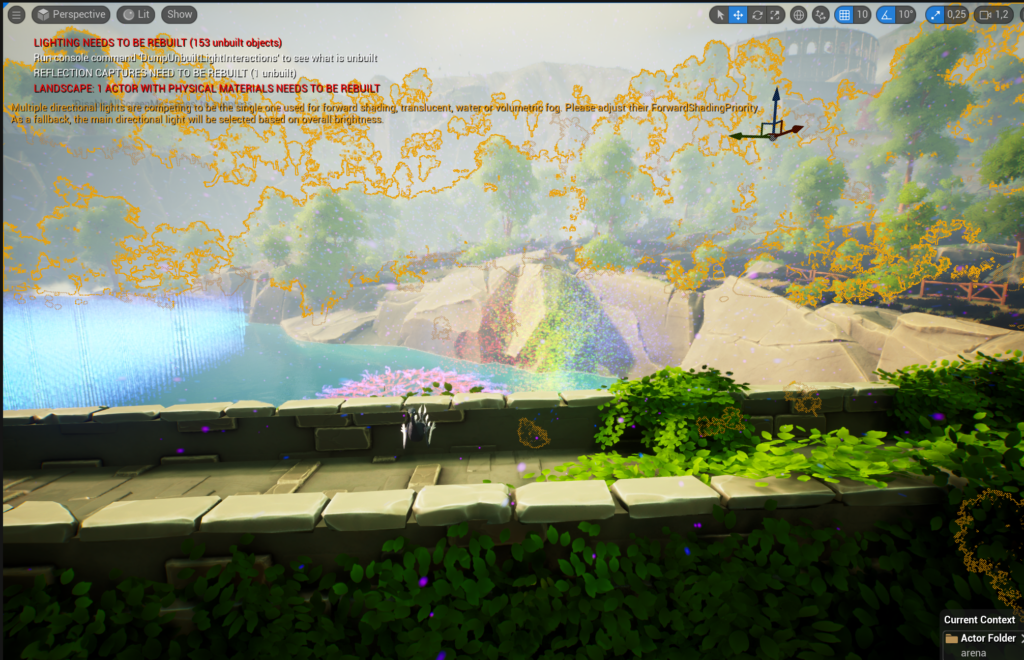
Mastering lighting and rendering
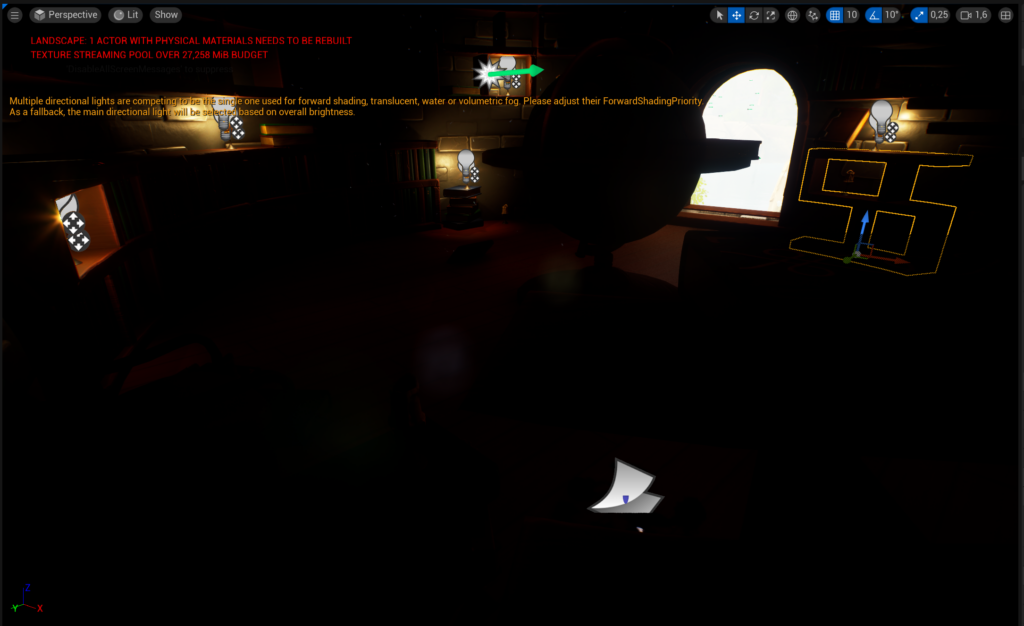
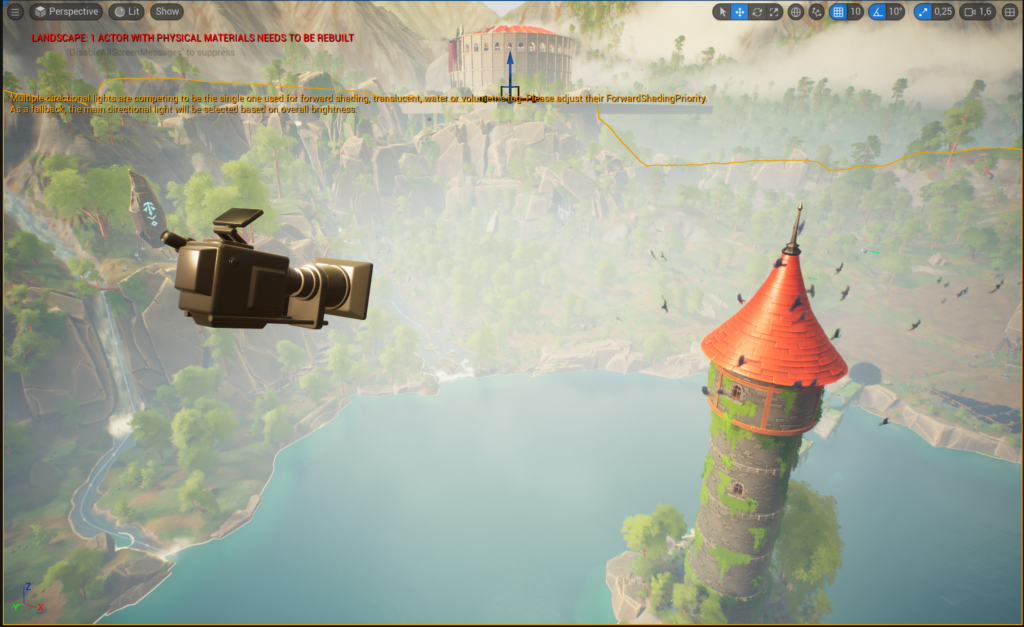
Unreal's lighting system is sophisticated and nuanced. To create an atmosphere that could carry the narrative, I had to study the interplay of light and shadow, which meant repeated rendering attempts, each session over three hours, tuning settings for the right emotional tone. It got particularly interesting when I stumbled on a new error message: "Multiple directional lights are competing to be the single one used for forward shading; translucent materials might not be lit as expected, please adjust their ForwardShadingProperty." That forced me into the technical documentation and forums to understand how to resolve conflicts between multiple light sources, especially with forward shading and translucency, which are vital for realism, and troubleshooting it taught me invaluable lessons that helped sculpt the visual mood.
Navigating node-based programming
Unreal's node-based programming was a significant learning curve. It's the backbone for complex effects that could react dynamically to the soundtrack, and it required a new way of thinking about visual scripting, both logic and creativity, to manipulate the nodes for the outcomes I wanted.
Synchronizing sound with Wwise / FMOD and Niagara
Immersive audio meant leveraging Wwise and FMOD, but the real challenge was harmonizing them with Niagara's effects. The synchronization had to be precise, any misalignment breaks the immersion, and it tested my skills in both sound engineering and visual design. In the end it ate a lot of time for little return that week, and I had to cut my losses and refocus.
Key elements of a compelling visual narrative
Drawing on user feedback, I focused on three parts that matter in a more cinematic music visualization:
Flow: a strong narrative moves smoothly, guiding viewers from one scene to the next into a cohesive story.
Alignment with the music: visuals shouldn't merely accompany the music, they should amplify its mood and rhythm.
Emotional impact: above all, a narrative should connect with viewers, evoking feelings and memories.
Check
User testing criteria
To assess the visual narrative I set specific criteria, rated 1–5: narrative progression, visual-music synchronization, emotion elicitation, visual clarity, transition quality, and overall engagement.
User feedback insights
Positive:
"I loved how the nature scene transitioned to the Gladiator Arena. It felt like a natural progression." … "The visuals and music seemed to be in perfect harmony, especially during upbeat parts." … "The Magic/Space segment was a highlight for me. It felt like stepping into another world."user test, Week 4
Areas for refinement:
"Some transitions could be smoother." … "At moments, the visuals seemed to lag behind the music's beats." … "The climax, while good, had moments where I felt a bit disconnected." … "The space area seems unfinished and not musically interesting."user test, Week 4
Follow-up:Q: Could you elaborate on the disconnect during the climax? "Right as the music peaked, I felt the visuals were subdued. The energy didn't seem to match." Q: Any transitions that felt out of place? "The shift from the Gladiator Arena to the Magic/Space segment felt sudden. A smoother bridge might help."
Rendered stills from the three environments and the camera work, where the lighting fight lived.
Conclusion
Crafting a compelling visual narrative is a delicate balance of storytelling, music harmony and emotional connection, and the user testing and feedback were instrumental in refining the project. It has definitely improved compared to Week 1, when I waited till the last moment to test; now I'm almost doing multiple TMC cycles within a week because I'm testing more often with friends and family. I've also accepted that hitting 100% of my learning goals for Unreal, Niagara and music visualisation was maybe too ambitious, the goal was always about getting better, not perfection.
Cycle 5 · Week 5: More advanced live visuals & MIDI
Week 5 · Refocus
Think
This week was central to focusing back on the technical side of more advanced visualisations, which I hadn't spent much time on in Week 4. I'd previously tried FMOD and Wwise but found they'd take too much time for too little progress that week; however, interviewing a VJ who'd been doing it for ten years gave me a lot of good advice on other software, like Ableton, MaxMSP and Resolume. So I decided to use the little time I had left to make an additional project, using techniques from previous weeks but focused purely on live visuals rather than themes and musical narratives.
I learned a lot from research here: MaxMSP can convert any live music to MIDI data automatically. That's something I'd thought about making, and I'm glad it already exists, I knew there were AIs that could generate MIDI from music, but not that software could do it live. For my use case, though, my VJ friend explained I don't need to buy MaxMSP (it's $600); I can work with pre-generated / played MIDI data, or live MIDI from a drum machine or keyboard. So that's what I focused on, and I could always buy the software later since the actual implementation with MIDI data is the same.
While testing this slightly altered project, I also demonstrated the enhanced "cinematic video with audio-reactive elements." A teacher recommended I have people think aloud while watching rather than afterwards, to elicit freer, less restricted responses. According to the VJ, the cinematic piece could also be used live but would need more control from the VJ for transitions at a concert or festival, and he was surprised the environment scene would actually be a unique addition I could bring to the VJ scene.
5.1 More feedback on the cinematic visualisation
Based on last week's feedback, which was mainly about wanting to see more live and more technical challenge, I decided to focus there. I did not want to risk redoing the entire project at first, but having implemented it I'm happy I did, since live/MIDI was one of the things I wanted to learn besides Unreal itself. The feedback I got on the cinematic piece (not especially technically challenging, so less relevant for my grade given the "more technical" steer) included: more camera angles during the drop; low-angle shots looking up; more variety with zoomed-in/out framing; easing the initial camera jerk; cutting on the beat instead of fading to black; praise for the birds around the tower and the energy ball; better-timed transitions; and keeping thematic consistency rather than shifting to space unexpectedly. The most valuable note was to have the first audio-reactive effect traverse the scene with the camera following it, which had been one of my goals from the start.
5.2 A live, MIDI-driven visualisation
Even though the VJ said my cinematic piece was unique and could be used with a controller and transitions, he also suggested Ableton Live with MaxMSP and Resolume. The new unique effect can be seen here:
The new unique, live MIDI-driven effect.
Make: a new unique Niagara effect
I started this effect much like the first, using my previous knowledge and testing categories as the "think" step, but making it resemble the music more closely and look more appealing based on prior testing and new research on MIDI and music visualisation. I didn't start from scratch; I built on what I had. This time I focused on amplitude rather than frequency data to make it even clearer that the visual is audio-reactive, and added more colours and different parameters for movement.
I started by creating one fountain, manipulating the spawn and update functions into an interesting animation, then, like before, linked it to the audio-spectrum data; finally, after duplicating it, I refined the amplitude through trial and error so the two effects overlap and complement each other. Getting a good fit across songs with varying amplitudes was tricky, so I made variables the user can easily tweak. This is where the audio spectrum is manipulated, similar to Week 3 but now with more focus on making the effect pop when audible and stay calm when there's little music, because earlier a low-volume track could still react a lot while hitting those frequencies.
Visualising instruments using Niagara
To visualise instruments, a kick, snare, hi-hat and the 12 notes of Western music, I chose a few effects to display outside the main visualisation. Each is fitted to the instrument, since some sounds last longer and need a shorter duration; the kick is a very heavy sound, so I added an effect that visualises a lot of impact. For the notes I kept it simple with 12 small shockwaves, one per note, so there's a lot of live communication about the notes being played.
melody / piano.Other effects around the main visualisation that fit and respond very accurately using MIDI.
Figuring out Ableton with Unreal
There are very few resources on connecting Ableton to Unreal, so I documented the setup. It surprised me how long it took to get familiar with Ableton, which is very different from the audio software I'm used to (FL Studio). As mentioned, MaxMSP is often used to generate MIDI from songs live but costs $600 and is out of scope until I have more MIDI portfolio projects; my approach is similar and plug-and-play, since I connect my drum machine and keyboard so their MIDI notes are sent automatically. Briefly, MIDI (Musical Instrument Digital Interface) is a standard that lets instruments and computers communicate and synchronise, transmitting pitch and intensity, control signals for volume, vibrato and panning, and clock signals for tempo, precise instructions that recreate a sequence of notes with high fidelity, far richer than the simple on-off signals of an old game controller.
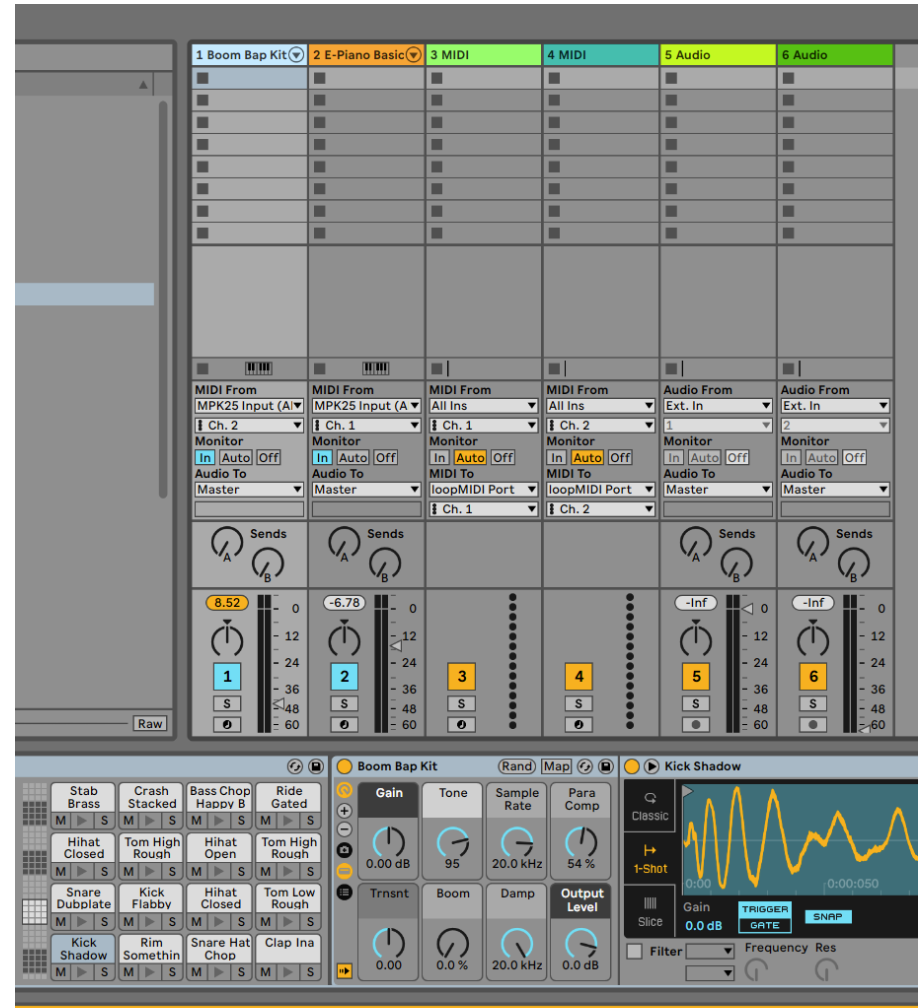
The drum pads are on channel 2; the keyboard and controller knobs are on channel 1. The knobs can control slider values like the camera, colours and sizes.You can't send MIDI directly to Unreal, so a virtual MIDI device is required, I chose loopMIDI.
Size manipulation based on MIDI velocity
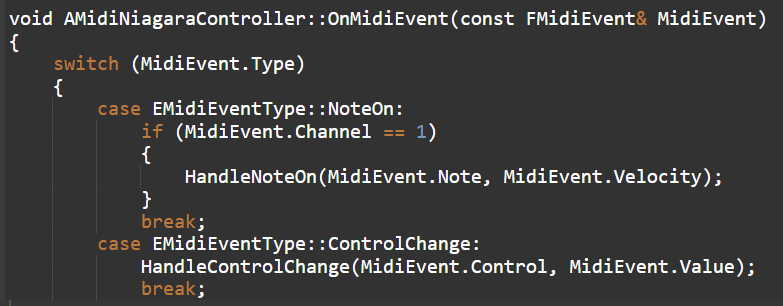
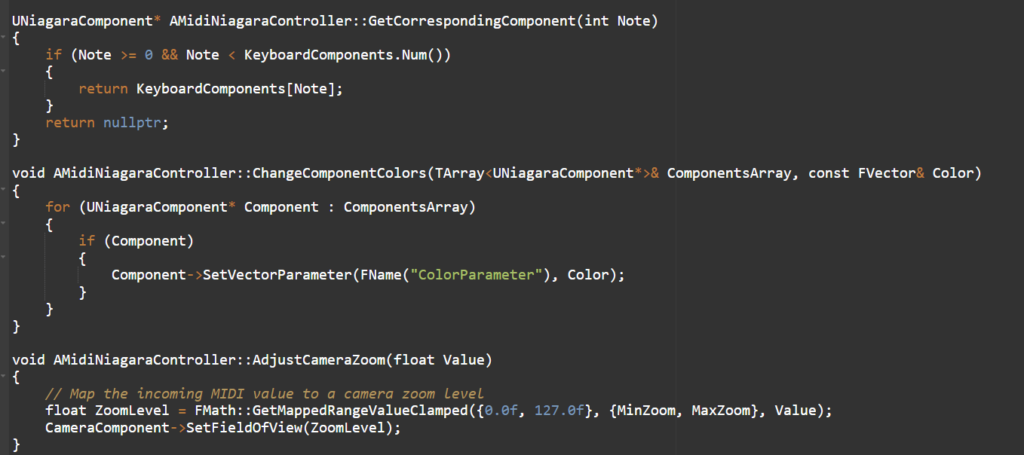
To make it interact with Niagara I created a simple Blueprint that listens for MIDI note-on messages. On a note-on, I extract the velocity and map it to a user-exposed Niagara parameter that controls the size and activation of the effect, so it expands and contracts in direct correlation with the velocity of the played notes.
Camera zoom control via MIDI
To control the camera zoom, I converted a designated knob's MIDI control-change values into a usable range for the camera's field-of-view, giving smooth zooming synchronized with the controller's input.
Check & testing
Due to time constraints I tested with fewer users than planned, but the five I spoke with were invaluable, one a former VJ and two graphic designers. I revised the test plan, removing the narrative/progression categories and adding new ones on the instrument visuals: visual-music synchronization, emotion elicitation, visual clarity, visual variety, and overall engagement. I asked everyone to think out loud, and it really felt like people said what they thought more freely rather than holding back.
User feedback insights
Positive:
"The visuals for the keyboard were spot on; each note had its own effect, which created a stunning light show, 4/5 for Visual-Music Synchronization." … "The overall loudness visualization in the center was a great touch, 5/5 for Emotion Elicitation." … "I play in an orchestra and we often have an empty screen behind us; your effects could really enhance our shows, especially since instruments are always in a fixed position and could show the watcher where to focus."user test, Week 5
Areas for refinement:
"The drumkit visuals were clear, but during fast sequences they tended to blur together, 3/5 for Visual Clarity." … "For the keyboard, the effects were identical for each note; some variation would be more engaging, 3/5 for Visual Variety." … "Visually impressive, but I wanted more complexity during prolonged playing, 3/5 for Overall Engagement."user test, Week 5
Test conclusion
The feedback highlighted the system's success at syncing visuals with music and eliciting emotion, especially the per-note keyboard effects and the central loudness visualization. It also pointed at clearer visuals for quick drumming, more variety in the keyboard visuals, and evolving patterns to stay engaging over longer play. Notably, all the testers also saw the cinematic piece, and several suggested merging the two: keep the cinematic project for transitions, or focus on the effects for an EDM festival set.
What the five weeks actually taught me
Not every goal was met, "particularly the more technical aspirations for creating competing music visualisations to world renowned festivals", and that was the point. The real lessons were about managing a project. Test early. Narrow scope. And one working VJ taught me more than any tutorial did. FMOD/Wwise ate half a week for nothing. Ableton + loopMIDI, which the VJ pointed me to, just worked. The strongest feedback was that the cinematic and live approaches weren't competing, they fed each other. That's the instinct the next project set out to build on: a baseline live system a venue can run, with a human able to step in when they want to.
Part Two
Unity + ShowBrain: seven combined cycles
This is a genuinely new project, picked up well after the Unreal one, once I'd spent real time in the scene and played several paid VJ gigs myself. It reuses the hard-won learnings, test early, one working VJ beats a tutorial, timing and energy over fidelity, but the engine, the goal and the audience are new. Audio and visuals advanced together, so each cycle covers both: what changed in the picture, and what changed in the audio brain that drove it, through to a first live-mic test in a room.
Cycle 6 · The pivot: why Unity, and why a separate audio brain
Cycle 6 · the decision that set the architecture
Think
What Unreal changed in my head
I came out of the Unreal project with a VJ's perspective, and it inverted my assumption that "better visuals = more impressive graphics." A small venue doesn't need world-festival fidelity. It needs visuals that run reliably on accessible hardware and read clearly from the audience side, without needing a specialist to drive them.
The pro tools the VJ described are powerful but expensive and assume an operator is present. So I aimed at the opposite end of the market: an autonomous layer for venues whose realistic alternative is no visuals, a static logo, or a generic loop pack.
What small venues actually needed
The constraints that came back from talking to VJs and venues were more concrete than I'd expected. The one that surprised me was cost: for a small venue, even a dedicated rendering PC is a barrier to trying the idea, let alone paying a VJ on top of it.
The rest followed from that. The realistic alternative for these venues is no visuals, a static logo, or a generic loop pack.
The constraints I chose to obey
Reading it all back, the asks sorted into a short list I decided to hold myself to:
Run reliably on accessible hardware.
Read clearly from the audience side.
Need no specialist to drive it.
Read as one coherent show rather than a pile of effects.
Set up fast and predictably; when a set is running, not breaking matters more than peak fidelity.
More reactive, an ask that came up almost word for word.
More abstract / more neon, the other creative ask that kept repeating.
Make
Three decisions, one per constraint
So I made three decisions, each tied to a constraint:
Unity URP instead of Unreal, not because Unreal renders worse, but because URP is cheaper to iterate (C# over C++), targets lower-end GPUs, and ships controlled fullscreen scenes quickly.
A separate audio brain, analysis split out of the renderer so it can be reliable, measurable, and reusable.
Spout into Resolume, output flowing into the tool venues already know, so they can evaluate it without replacing their workflow.
Two practical reasons pushed the Unity choice further. I'm more fluent in Unity, so I'd move faster; and anything I build here, the reactor, the shaders, the driver bank, I can drop straight into other game projects, which the Unreal work never gave me back. The point was to prove value before a venue buys any hardware, and the visuals would be coherent presets and families, not one-off clips.
One brain, two modes
From here on the system had to work in two modes off the same brain. Most venues don't want a VJ, they want to turn it on. That's the autonomous path: Unity drives the display directly, ShowBrain picks and drives the visuals to the music, and a watchable first frame is meant to show up with no clicks.
A VJ who wants to shape the night gets the other path: Unity's output goes over Spout or Syphon into Resolume, and they composite, layer and remix it live. Same analysis, same deck; the only variable is whether a human is on the controls.
One brain, two modes. The audio brain (ShowBrain, Rust) is split out of the renderer and speaks OSC, so Unity can either drive a venue's screen directly, the zero-click, no-VJ path, or hand its output to Resolume over Spout for a VJ who wants to composite and modify it live.
The first crude proof
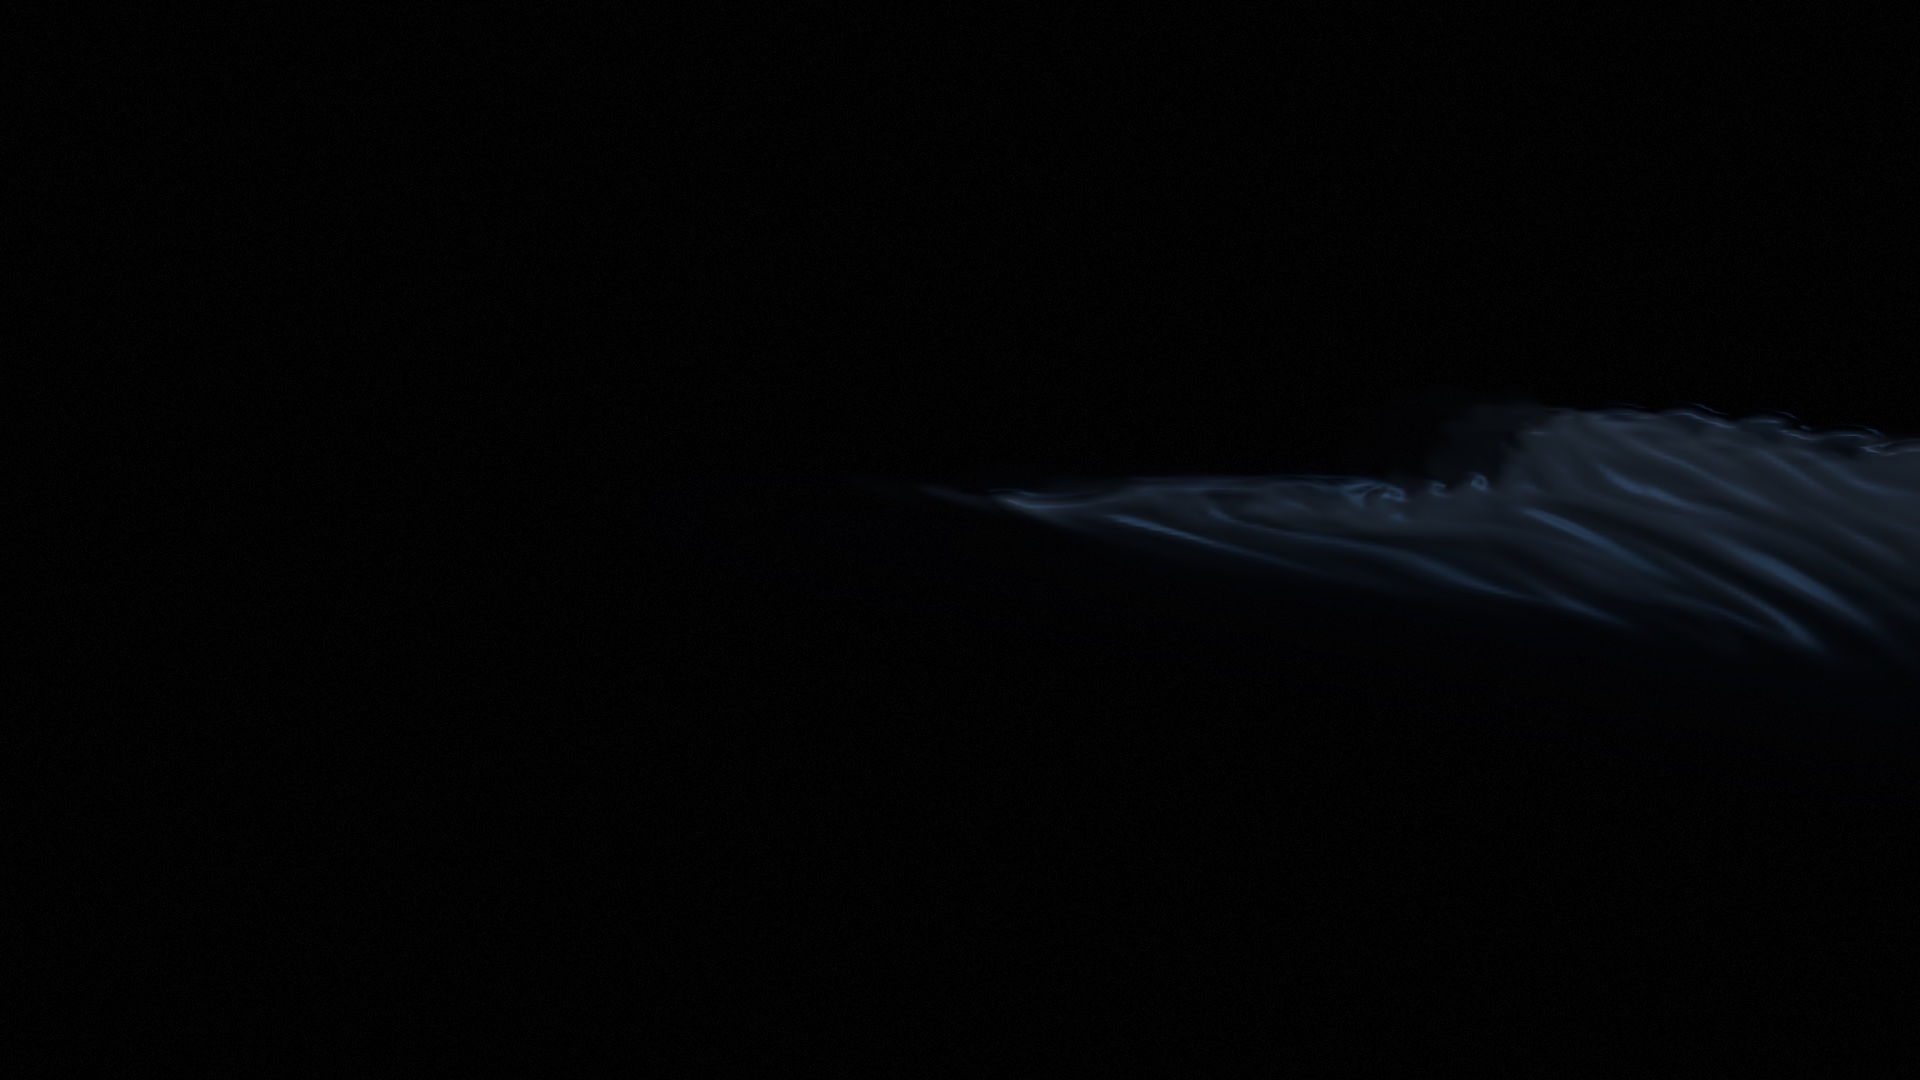
None of this was settled purely on paper. Before committing to the architecture I roughed it out: a couple of crude Unity visuals wired to a headless audio tool that had no interface at all, just numbers streaming past in a terminal. The test was blunt. If a rough metaball could visibly move to a kick arriving over OSC, the split-brain idea was worth building properly.
The first things on screen. A raw metaball and a near-empty drop. Crude, but enough to prove a Unity visual could react to audio arriving over OSC.
And the audio tool, at this point, had no UI whatsoever. It was a headless command-line binary that printed its analysis and fired OSC at Unity:
$ showbrain-audio-cli --input-device "MacBook Pro Microphone" --osc-target 127.0.0.1:9000
[audio] engine up     fft=2048  hop=512  sr=48000
[osc]   -> 127.0.0.1:9000   ok=72/s  err=0  would_block=0
rms -21.4dBFS  kick 0.81  sub 0.44  bass 0.37  energy 0.66  beat *  128.0bpm
rms -24.1dBFS  kick 0.12  sub 0.20  bass 0.31  energy 0.51  beat .
rms -19.8dBFS  kick 0.93  sub 0.61  bass 0.52  energy 0.78  beat *  128.0bpm
The audio brain before it had any interface. The AudioBrain Probe, with live meters and a 64-band spectrum, came later, in Cycle 8.
Check
What the VJs and venues said
The check here ran with the VJs in my network and the first venue operators I spoke to. The Week-5 VJ interview was still the anchor: the ten-year VJ had told me the industry tools are expensive and assume an operator is present, and that even a cinematic piece can serve a show if a VJ has controller-level control of it.
The venue conversations that followed said the same thing from the other side. The one that stuck with me came from a small-club operator:
"If I've got to put a second expensive PC in there, plus someone who knows TouchDesigner, I'm not switching it on for a normal Friday. It just has to work. And look like it's meant to be there within ten minutes, not some loop running in the corner."venue operator, early conversation
Read against a venue that can afford neither the pro tools nor a dedicated VJ, that is the case for an autonomous layer, and it lines up with the three decisions: accessible hardware (URP), a reliable separate brain, and output into the tool they already run (Spout into Resolume). A competitive write-up (SHOWBRAIN_VS_SYNESTHESIA.md) reached the same "don't build the heavy version yet" verdict from the desk side.
Conclusion
The architecture was set: two modes off one brain, autonomous or VJ-driven, with the same analysis behind both, and each of the three decisions tracing back to a constraint from the VJs and venues.
Cycle 7 · The first build: a Unity reactor, and an audio tool that went from Python to Rust
Cycle 7 · the two engines take shape · Apr 2026
Think
From architecture to something running
Cycle 6 settled the architecture, Unity plus a separate audio brain, on paper. Now it had to exist. Two things had to come first: a minimum Unity engine that could react fullscreen, and a way for it to learn what the music was doing.
The smallest engine I could trust
The Unreal scope lesson said start small on the visual side. The audio side was less obvious than I expected, and it's where the project's tooling actually changed shape.
Make, the visual engine
Building the reactor, eleven effects
The first day already walked the whole loop. Starting from a reactor shader (two soft "wells" of plasma), I built out from there:
layered domain warp, a LUT colour trend, a beat-locked flicker and a vignette (d964216);
wired a controller through to the shader and drove URP bloom from loudness (6180d7f);
added rim and emanating sparks, and closed the loop with warped feedback trails (2e8fdee).
I locked the scope at eleven effects and wrote it into the decision log so the build couldn't sprawl.
A couple of decisions there don't show up in a screenshot. Feedback-trail decay is Lerp(0.92, 0.98, lufsNorm), so louder music holds the trails longer. And moving to HDR meant reallocating the feedback buffer as R16G16B16A16_SFloat so emissive energy survived the round-trip, with the bloom ceiling pulled from 2.0 to 1.0 because HDR is "louder" per unit.
The reactivity itself is often just one audio-driven uniform. The well, for instance, inhales on the kick, _RadiusBreath is pushed from the kick envelope every frame, and scaling the radius makes the whole shape breathe:
// ReactorWell.shader, the well "breathes" with the kick.
float2 toPolar(float2 uv, float2 center, float radius, float aspect)
{
    float2 d = uv - center;
    d.x *= aspect;                               // keep circles round under any aspect
    float effR = radius * (1.0 + _RadiusBreath); // kick envelope -> inhale / exhale
    float r = length(d) / max(effR, 1e-4);
    return float2(r, atan2(d.y, d.x));           // (normalised radius, angle)
}
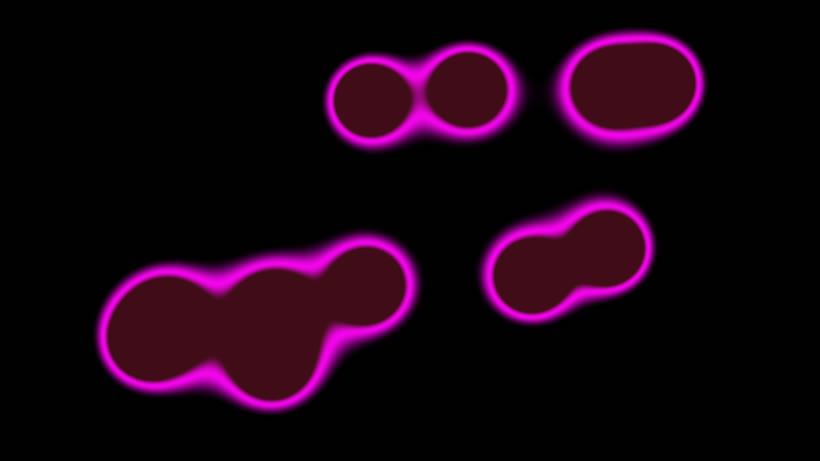
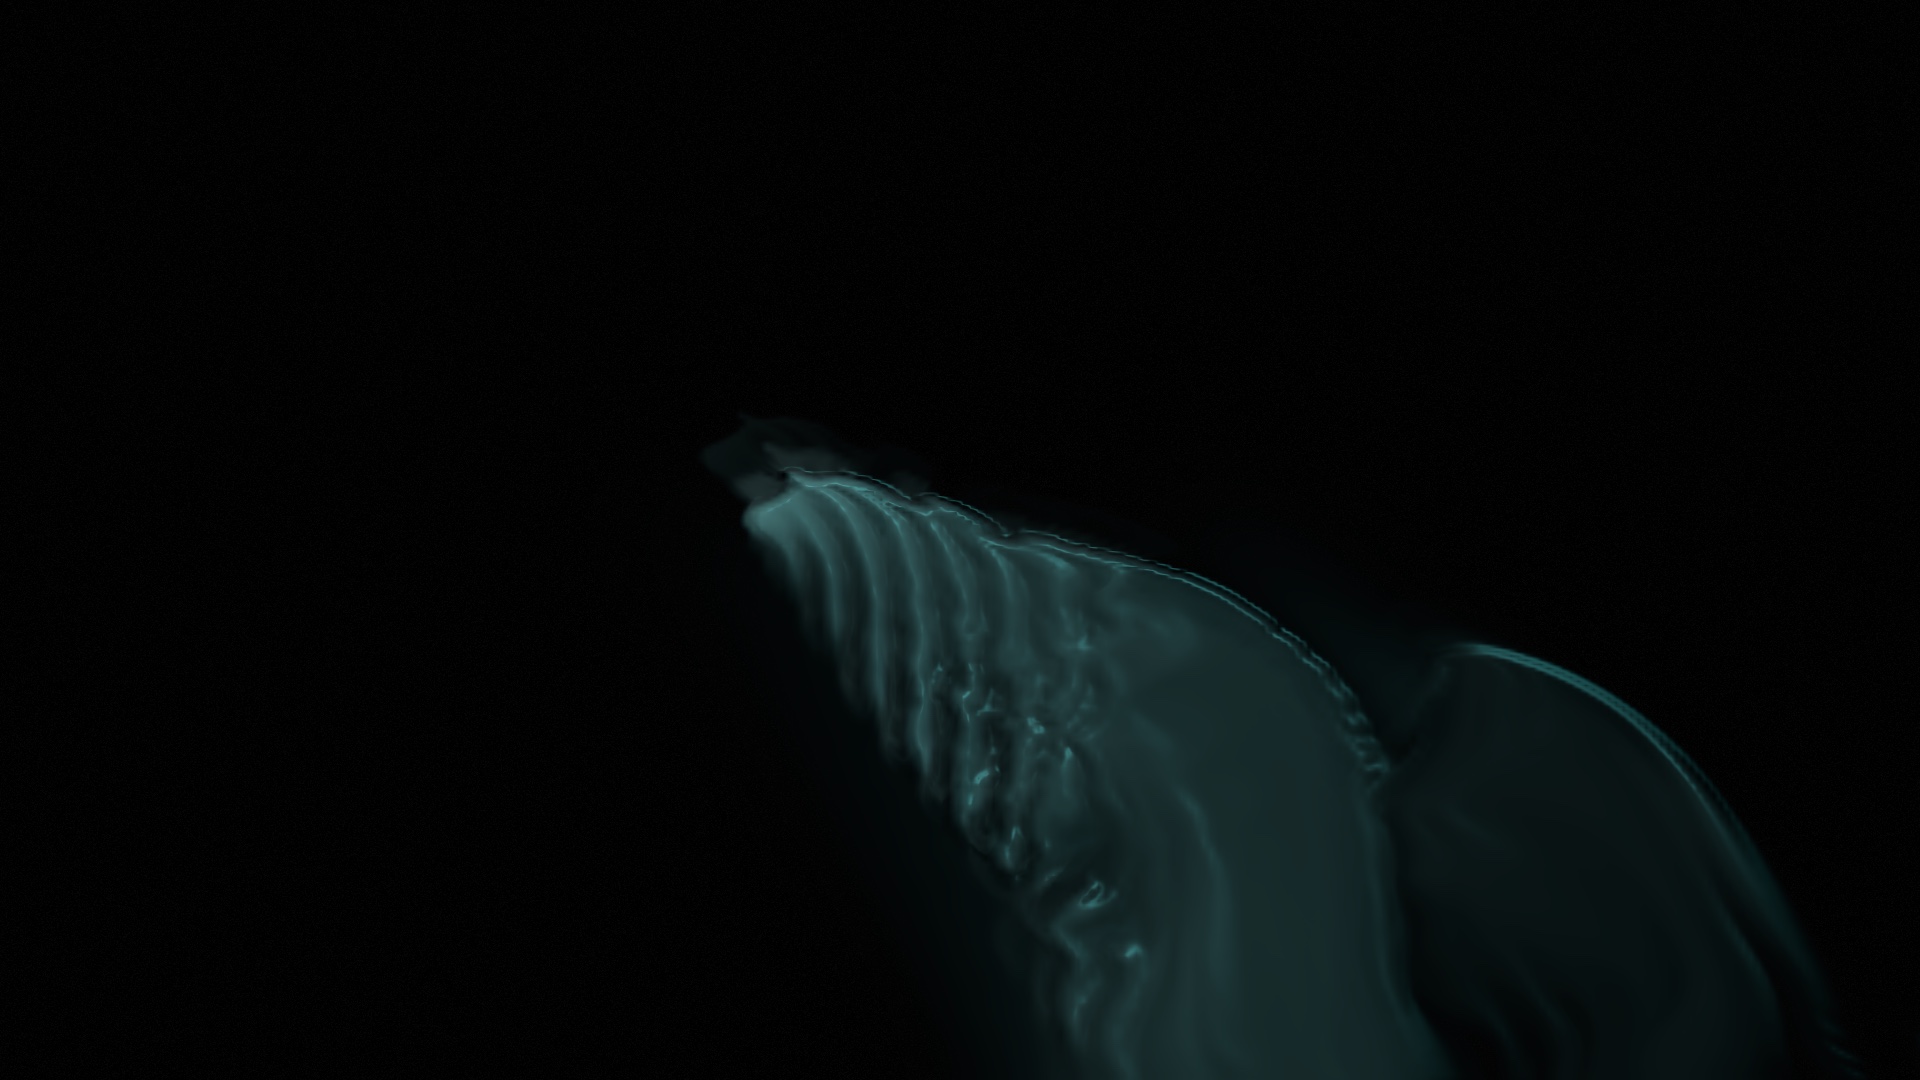
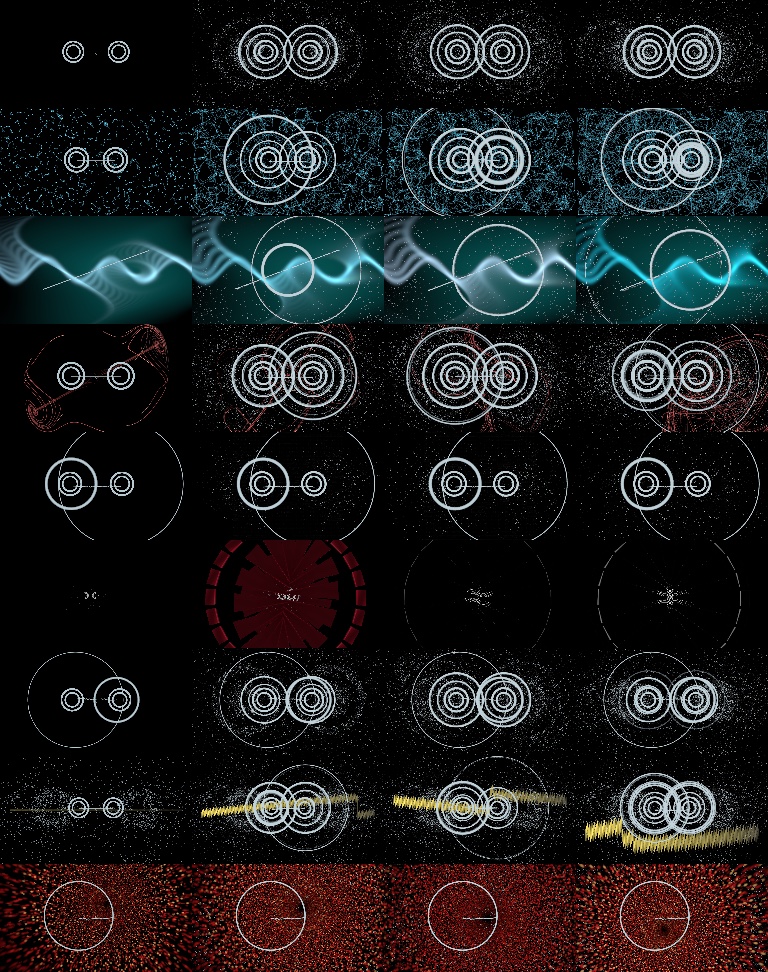
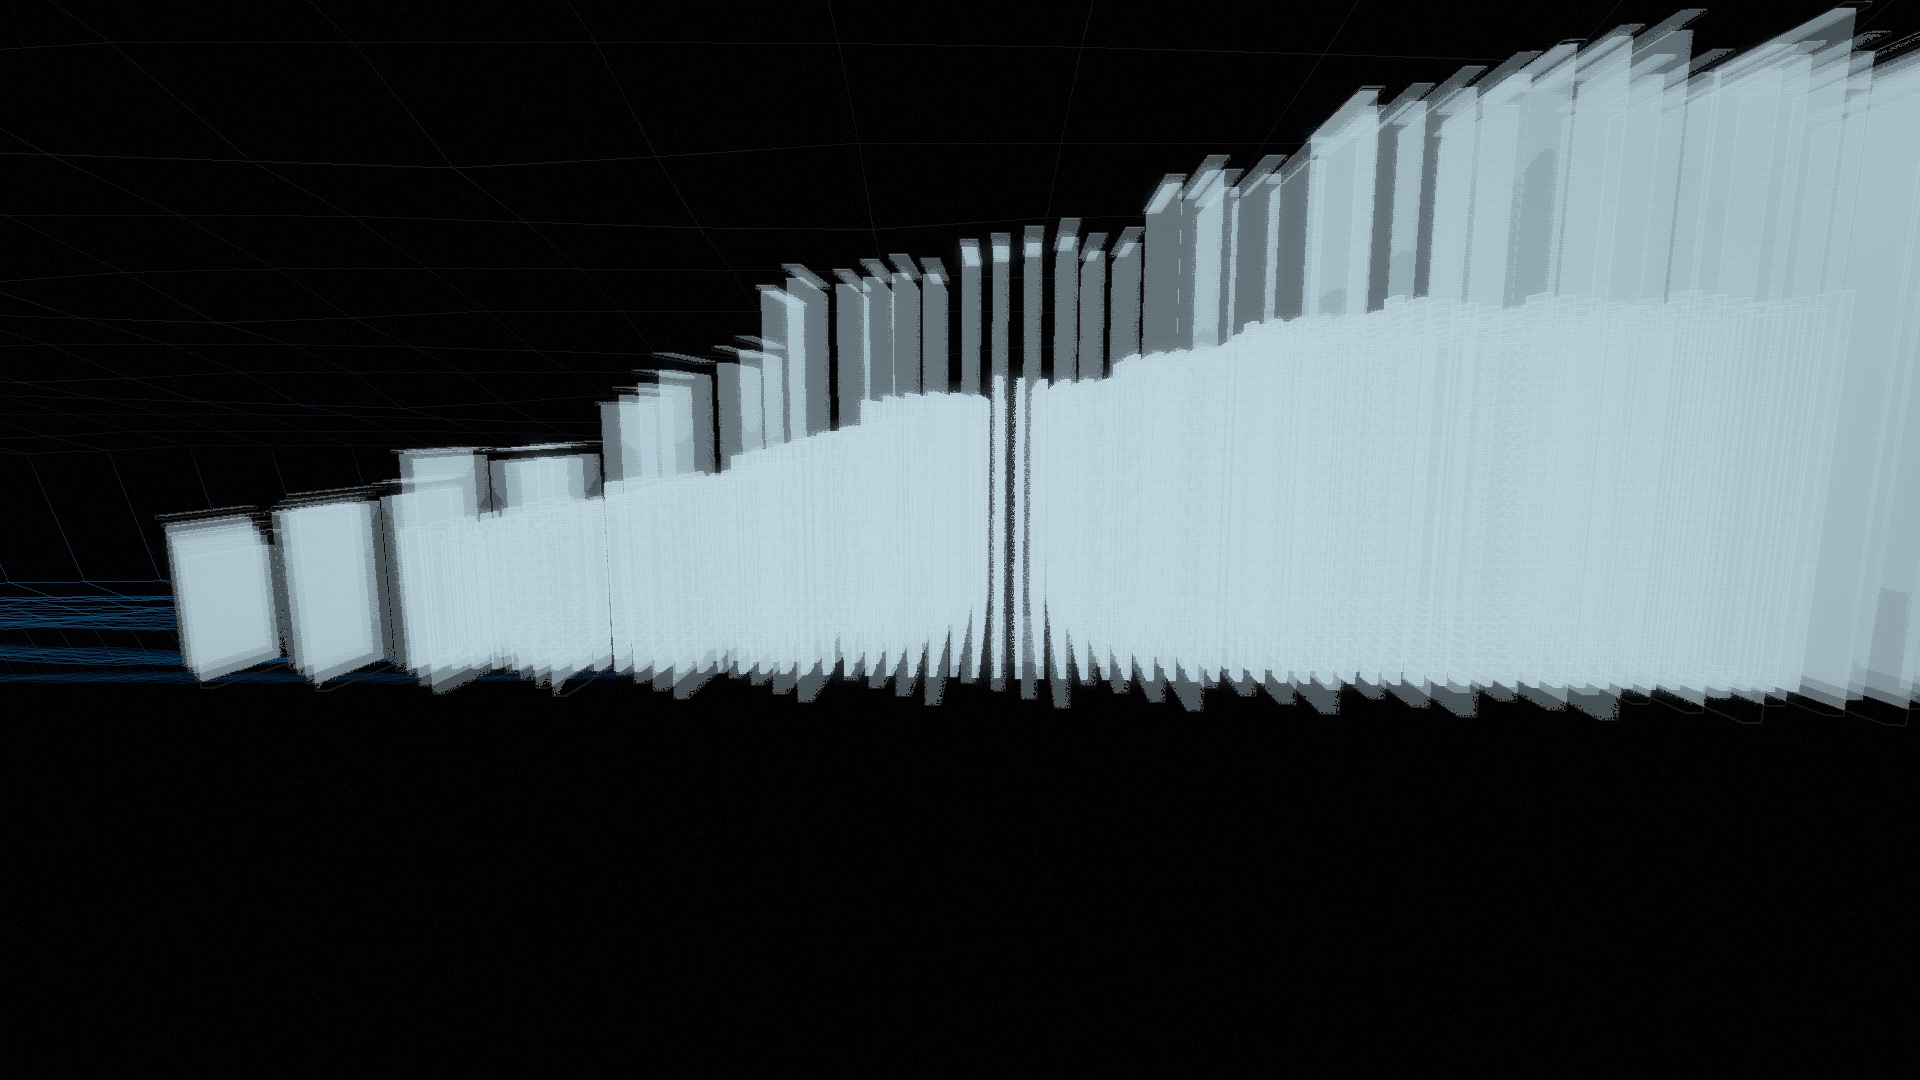
Where every visual began. Left: the two "reactor wells" as naked wireframe rings, captured with the bloom pass off, literally two eyes on black. Right: preset #000 "VoidSignal," the same wells with a thin particle halo. Everything in the deck grew outward from this.
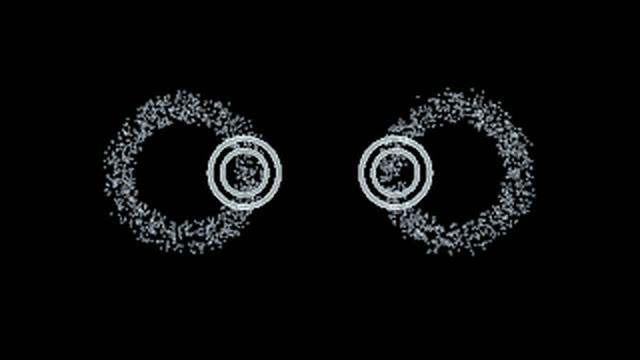
Most of the early deck barely reacted. Two more presets from the first passes: a thin dot-lattice, and a "drop" that stays nearly black. The visuals moved, but not much, and not clearly to the music. That gap is what pushed the next cycle onto the audio.
Make, the audio tool, Python first
Why Python was the wrong live shape
The audio analysis didn't start in Rust. ShowBrain's first analyzer was Python, python-audio/server.py, which calls itself a "World-Class Audio Analysis WebSocket Server" and runs the standard Python MIR/ML stack (librosa and madmom through torch and crepe) to stream 64-band spectrum, LUFS, HPSS, build/drop and per-instrument onset to a Tauri desktop UI over a WebSocket (port 9876).
That was the wrong shape for this project. The Unity visual engine needed a low-latency control stream it could consume in real time, over OSC, not a WebSocket feeding a desktop app.
Moving the live path to Rust and OSC
So the live path moved to Rust: rust-core/audio → a thin headless showbrain-audio-cli → OSC /sb/*, chosen for causal, memory-safe real-time DSP, the same Rust rationale I'd taken from online research (f938d15, 5b0ccda). Other live audio-reactive tools built on Unity's GetSpectrumData had hit the same wall and explicitly planned to "rewrite parts in native code for efficiency," so the instinct wasn't mine alone.
Keeping Python as the offline brain
The Python stack wasn't thrown away, it became the offline brain (more on that next cycle). On the Unity side the source evolved the same way: a keyboard MockAudioSource first, then a legacy OscAudioSource listening on UDP 7000 for /showbrain/audio/*, then a ShowBrainBridgeAudioSource on UDP 9000 for the new /sb/* schema v2.1.
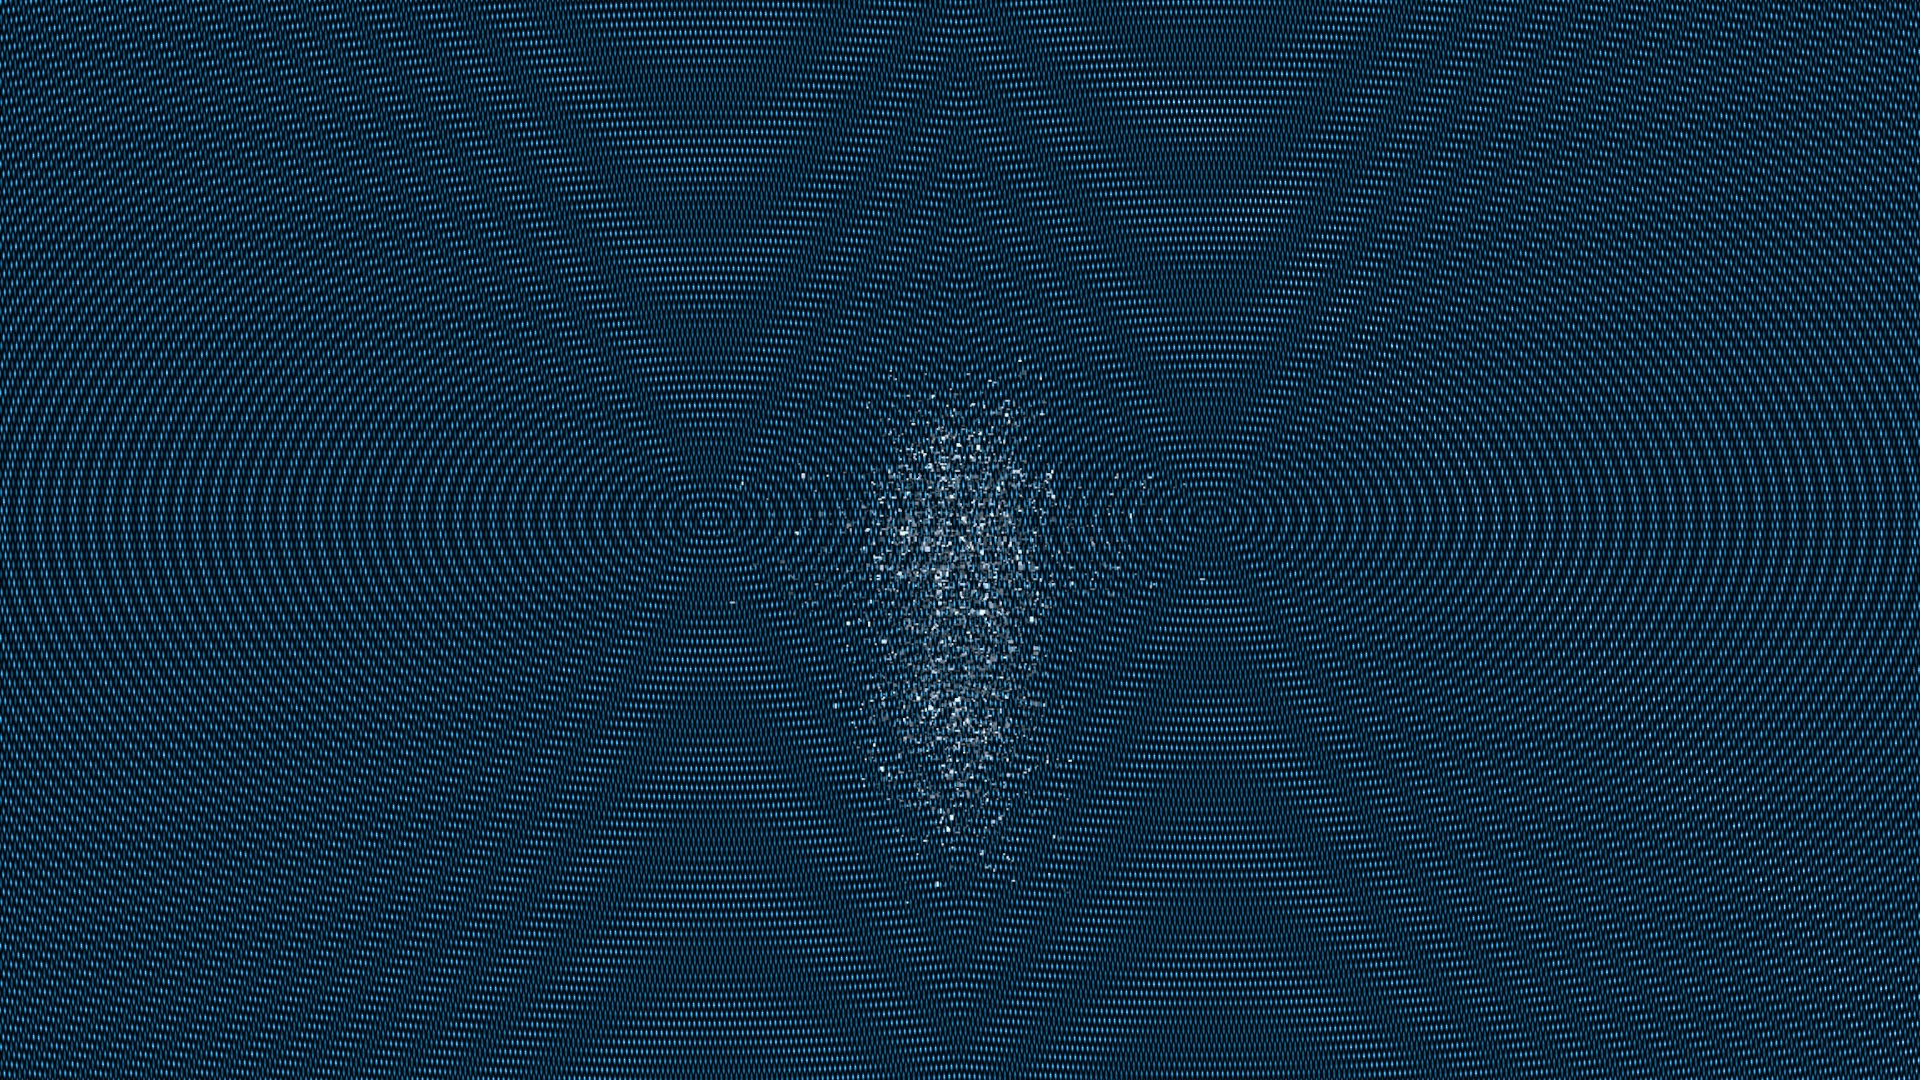
The early engine reacting. One shader plus a feedback buffer, driven mostly by loudness, no palette identity, no per-band response yet. The baseline everything later is measured against.
Check
Machine checks
Most of this cycle's checks were machine-vs-spec: compile gates, fixture-based adapter tests, and black-screen debugging, because a scene can compile and still render black.
Schema drift, fixed by dual-emit
On the audio side, a schema-drift checkpoint caught the contract slipping, the runtime was still emitting /showbrain/audio/* while the docs claimed /sb/*. I didn't fix that by deleting the old namespace; I made ShowBrain dual-emit both, with a one-time deprecation warning, so nothing already listening would break, and deferred removal to a verified cutover (c6f0aac).
To stop the two repos drifting apart again, ShowBrain now emits its schema as a contract fixture and the Unity receiver is tested against that manifest, so a mismatch fails a test instead of a show (55bfe17, 4352e2d). The bridge shipped default-off behind a flag.
The VJ reaction
The check that set up the next cycle wasn't a formal test at all. The first time I put the reactor in front of a VJ in my network, the reaction was blunt:
"Yeah, it moves. But I can't tell what it's reacting to. Feels like only the volume's driving it, so when it gets loud everything jumps at once."VJ, first reactor demo
Conclusion
This cycle got both engines running, a Unity reactor of eleven effects and a live audio path moved from Python to Rust over OSC, but the VJ's reaction showed the visuals still read mostly as loudness. I couldn't tell which part of the music a visual was reading, which meant I couldn't yet trust the audio, so the next cycle set out to pull the real musical signals apart from plain loudness.
Cycle 8 · Learning to trust the audio
Cycle 8 · audio honesty + the Probe
Think
I didn't trust what it was moving from
The first reactor moved, but I didn't trust what it was moving from. So before wiring more of the audio into more visuals, I had to know which signals were solid.
I needed to see the analyzer think
Reading numbers off a log wasn't enough. I needed to actually see the analyzer's reasoning, not just read its numbers.
Make
Building the AudioBrain Probe
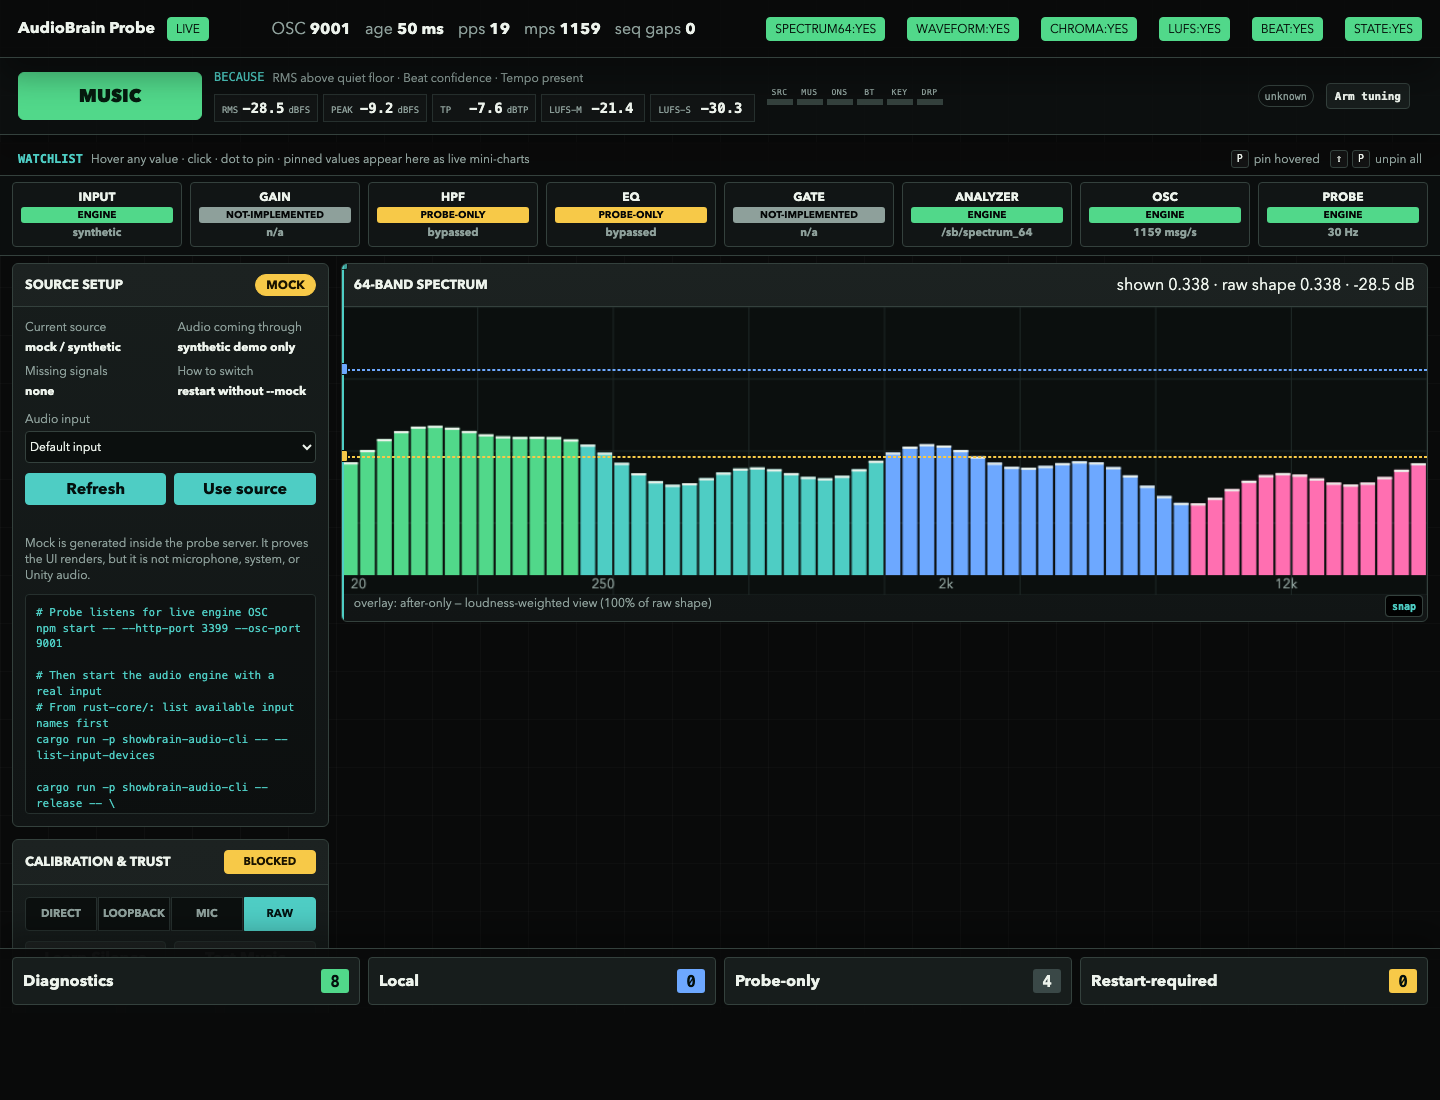
I built the AudioBrain Probe: a standalone browser console that listens to live /sb/* (or replays recorded JSONL) and shows the analyzer thinking. It states why it called a moment "MUSIC" ("RMS above quiet floor · beat confidence · tempo present"), reads LUFS and true-peak live, draws the 64-band spectrum, and exposes the whole signal chain, input → gain → HPF → EQ → gate → analyzer → OSC, marking each stage engine vs probe-only.
Deliberately, it's read-only of the visuals. It never became VJ control software.
The AudioBrain Probe, the tool that made the audio honest. The MUSIC verdict shows its reasoning ("because RMS above quiet floor · beat confidence · tempo present"), the meters and 64-band spectrum read live, and the signal-chain row marks each stage engine, probe-only, or not-implemented. The honesty is built into the tool: here the source panel flags itself mock / synthetic and CALIBRATION & TRUST: BLOCKED, it refuses to present synthetic audio as if it were a live mic.
Python as the offline oracle
Underneath, I used the Python stack, kept from Cycle 7, as the offline ground-truth: an oracle comparator (scripts/oracle/audio_oracle.py) and eval harnesses graded the Rust DSP against labelled reference material instead of my own ear.
Choosing public reference material
The tuning corpora were public MIR datasets, each picked for one signal:
GiantSteps-Key for musical key on electronic tracks.
MDB-Drums and IDMT-SMT-Drums for drum-onset timing.
the Jamendo singing-voice corpus (Ramona et al., CC-BY) for vocal activity on /sb/voiced.
synthetic click-tracks for exact tempo and beat ground truth.
A non-causal neural tracker (beat-this) and aubio stood in as reference detectors to score against. No copyrighted audio lives in the repo, the evidence is captured OSC/JSONL plus local metadata; the live-room audio only arrives in Cycle 12.
Check
The uncomfortable numbers
The first real numbers were uncomfortable. A neural beat tracker (beat-this) scored 0.917 F-measure against the Rust DSP's 0.498(74c02a0), far better, but I recorded that it's non-causal and a Rust port needs "rotary export" (f61e3e3), so it can't run in a live show; it stayed in the offline Python path.
A real ITU-R true-peak meter replaced a ×1.05 fudge (5ef56ea). And /sb/voiced measured near chance, so I shipped it exposed but explicitly told the visuals not to trust it (ca991d7).
The 4x tempo bug
The sharpest lesson came from a tempo bug: the live engine's beat clock was running about 4× too fast while the offline scorer still looked fine, because it wasn't sharing the live timebase (6b08ddb). A VJ in my network I'd shown an early build put the stakes plainly:
"If the beat's off it just falls flat, but really sure of itself. Give me five things I can trust. Fifty I can't are no use to me."VJ, on the early reactor
The VJ wanted fewer signals he could trust; my partner, hearing the same build as a live-sound tech, was the check on whether the audio was honest in the first place, before any of it reached a visual.
Kick and sub first
So "trust the audio" came to mean trusting it in the live path, not the harness, and shipping fewer, trusted signals, the kick and the sub-bass first, because those are the two that actually carry a room.
With those identified, Unity stopped synthesizing its own spectrum and started ingesting ShowBrain's real bands_64 over OSC (and chroma, though that one it received without yet leaning on it).
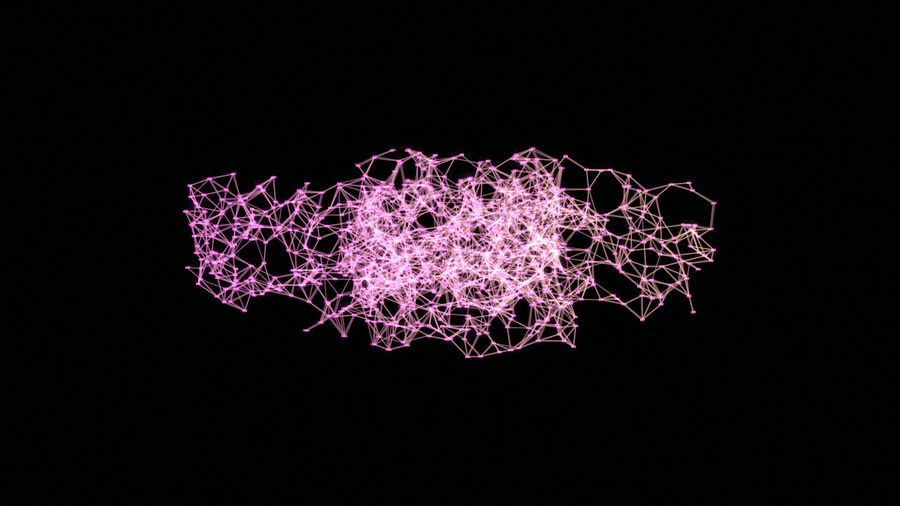
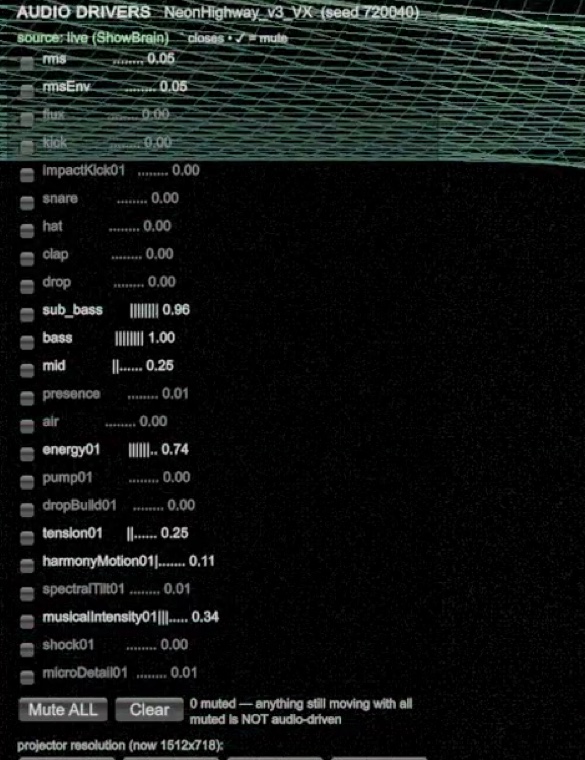
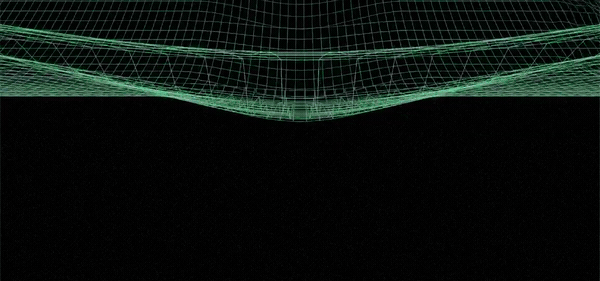
NeuralCathedral, one early preset. At silence (left) it's disconnected nodes floating apart; drive the energy01 input (right) and they snap into a glowing connected mesh. Captured from the audio-driver isolation matrix, proof the visual is inert without audio and alive with it.What Unity receives, source: live (ShowBrain), every driver mutable so I can mute one and confirm a visual actually depends on it. This panel later runs as the live signals pane on the reactivity reel.
Conclusion
This cycle named the signals I could actually trust, the kick and the sub-bass, and made the analyzer's reasoning visible with the Probe. The next cycle: once it reacts, does it all look the same?
Cycle 9 · Variety, then coherence: the cycle the VJs rewrote
Cycle 9 · uniqueness & the overlay problem
Think
The risk flipped
Once the engine could react, the risk flipped. The question was no longer "does it move?" but "does it all look the same?"
An internal review found about six lookalike buckets and only ~12 of 72 presets reading as genuinely distinct. There were too many circles, lines, glyphs, washed-out post. If the audience reads the whole deck as one visual, it might as well be a screensaver, and "more abstract / more neon" had been an explicit ask.
Make
Growing families along a club set's gaps
Using Resolume reference footage as a source set, I grew families along the gaps a club set needs, not "more presets" but structurally different ones:
tunnels and abstract space;
simulation organisms that feel alive (flow, flocking);
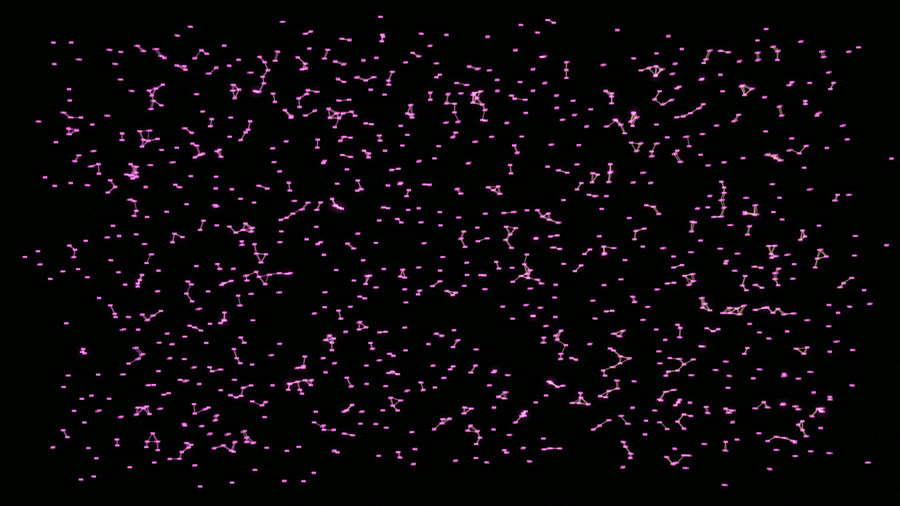
networks and constellations;
optical/printerly looks (moiré, gratings, cymatics, cheap at 4K);
and big-room atmosphere.
Old flat looks stayed playable so before/after captures were possible.
What made a preset count
I ended up with a rough checklist for whether a visual was any good:
filled geometry,
clear structure,
its own palette,
real responsiveness,
and enough screen presence without blowing out to white.
One steer here came from outside the club world. Sammy, from StudioVrij, had worked on the VR Silent Disco immersive installation at the Nxt Museum; I got to try it there, and the feedback pushed me toward simpler, cleaner forms, shapes that read at a glance in a real space rather than asking the eye to decode detail. It's part of why the stronger presets lean on filled geometry and clear structure over clutter.
Check
The VJ atlas review
Then a VJ in my network reviewed the whole roster against the rendered atlas, preset by preset, and it was the most useful check in the project. The sharpest note wasn't about taste, it was a diagnosis:
"On half of these you've patched the audio straight onto exposure, so the moment the drop hits they blow out to flat white and the visual you built just vanishes. And the same twin-ring scope layer sits on top of everything, on a few it even reads as a face, two bug-eyes, so when you cut between them live the crowd reads it as one visual."VJ atlas review · visual_feedback_user_report.md
One note cut deeper than the overlay, and it was about reactivity itself:
"Watch what happens on the drop, half of them fall to black or one flat colour. The good frame is the quiet one; the moment it matters, the visual gives up."VJ atlas review · visual_feedback_user_report.md
That was exactly the "fix/quarantine" bucket the review was triaging, a spectrum of breakage rather than a single failure:
What the review was triaging, the "fix/quarantine" bucket as a spectrum of breakage: SlimeReactor clipping to one flat colour (audio wired straight to exposure), PlasmaClouds drawing nothing at all, and CathedralLight blowing out to a clipped white slab.
The verdict, preset by preset
It came with a triage, a verdict on every preset:
5 to fix/quarantine,
8 to rework before any show,
11 to tune,
26 to keep,
35 strong-but-needing a clean / no-HUD variant,
and 25 heroes.
It named which were hard-broken, PlasmaClouds, InkVoid, SlimeReactor, EmberDrift, all clipping to flat white because audio was driving exposure directly. It also named which deserved to keep their readout layer because the diagram is the point (the scope and readout family).
The advice was concrete about where that overlay belonged:
"My advice: make that layer a separate performance layer, off by default … and make clean, no-HUD variants of the organic, tunnel, chrome, blob, nebula and city visuals."VJ atlas review · visual_feedback_user_report.md
The corrections I made
So I made the corrections it pointed to, almost to the letter. OverlayGate(e76d24f, fe10c52): the scope/HUD/glyph layer became a separate performance layer, default off, kept on deliberately for ~10–20 readout presets, stripped from the organic, tunnel, chrome and nebula visuals via clean / no-HUD variants.
The white-out visuals were fixed by softclipping output and not wiring audio straight to exposure. And the recurring twin-ring "scope" language was pulled from presets where it wasn't intentional, because that was what made unrelated visuals feel identical.
The LED-wall warning I filed
Another note pointed past this cycle entirely, to a room I hadn't tested in yet:
"On your laptop these look sharp. Half the geometry ones will moiré and strobe the second they're on a real LED wall, you can't sign those off until you've seen them in the room."VJ atlas review · visual_feedback_user_report.md
That one I filed for the venue test, and it's still open, most of the geometry heroes have never been on an LED wall.
What changed after the pass
The before/after atlas shows how much the review moved:
The same roster, before and after. Left: when the VJ reviewed it, most cells were the same bare rings and HUD, the "debug layer over everything." Right: the same grid once the overlay was gated off and the families grew apart, each preset finally reading as itself across silence, groove, build and drop.
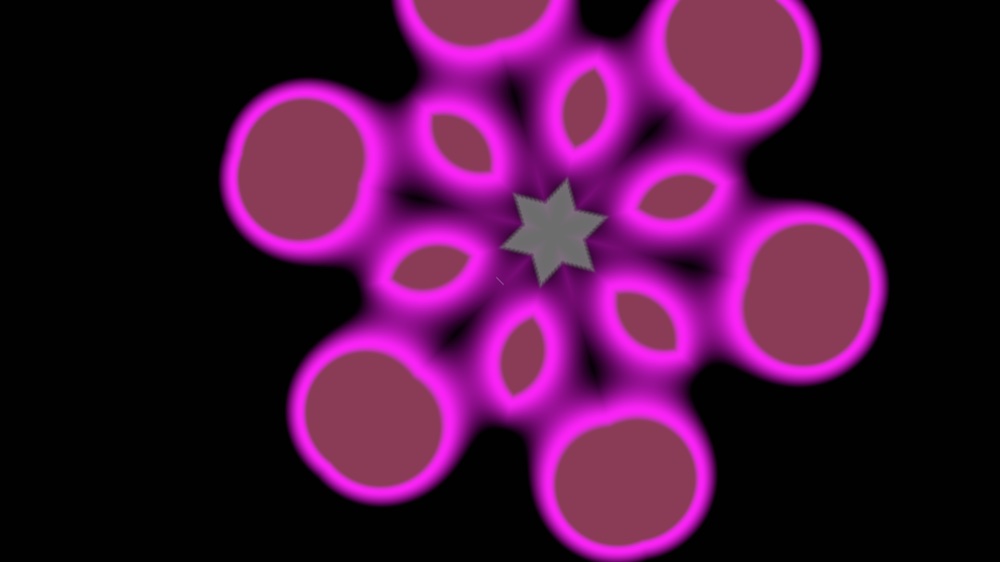
NeonBlobKaleido went from a soft single-hue blob to a structured kaleidoscope with its own palette:
NeonBlobKaleido, then and now. A soft single-hue blob becomes a structured kaleidoscope with its own palette.
Conclusion
After this review I mostly stopped inventing new looks and started executing the verdict it had named. The next two cycles turn the hero and fix/quarantine lists first into a deck, then into a reel.
Cycle 10 · From a catalogue to a show: heroes, decks, and the driver bank
Cycle 10 · live-readiness + authored drivers
Think
A deck, not a catalogue
A venue won't sit and read a long list of preset names. It wants a usable deck, a small set of visuals it can trust that don't all blur together.
And it wants to know why a visual does what it does, so a setting can change when the room needs it. That reframed the whole cycle for me.
What the atlas review handed me
The atlas review from Cycle 9 hadn't just flagged lookalikes. It handed me a hero list and a fix/quarantine verdict, which was a spec for what a deck should contain.
So there were two jobs. Build the deck the review pointed to, and make the autonomy something you can look inside.
Make, the deck
Hardening the heroes
The work ran in parallel, but toward one goal: a show. A bug sprint fixed dark and flat visuals, with VoxelRain's brightness among them.
I hardened a handful of standout visuals into reliable "heroes". WormholeCathedral became one. ChromeBeingAvatar was cut, then restored once its body lighting worked.
Filling the deck's vocabulary
New batches of presets filled the gaps in the deck's vocabulary:
anti-aliased lines to cut moiré
2D gold cymatic plates
instanced-colonnade cathedrals
brutalist glitch
datamosh
laser haze
A global highlight compressor finally tamed the additive white-core blow-out that hit exactly when the music peaked. That's the same "subdued/overblown climax" my Unreal testers flagged back in Week 4, handled in the current deck this time.
A palette director plus section-aware camera moves gave the deck colour and motion that follow the song's structure.
Matching the room's lighting
One steer came from outside the VJ world. My partner runs sound and lighting at parties, and she caught something none of the VJs had mentioned:
"At most parties the lights are already on a colour, deep red, then blue, whatever the tech's running. It'd be good if you could match the palette to that at the start, or point a camera from the booth at the room and let it pick up the colour the lights are on."lighting & audio tech, parties
So the colour work isn't only about picking nice hues. It's about letting an operator lock a palette to the room up front, or sampling the room's own lighting from a camera on the booth PC, so the visuals sit inside the lighting design instead of fighting it. To be clear about where that stands: the manual palette-lock I've used, but the camera-colour sampling I've only tried in my own room against my own lamps. Whether it reads a real venue's stage lighting and haze is still untested, and needs a room outside mine to prove.
Make, authored drivers
The authored driver bank
This is where ShowBrain's contract grew past the v2.1 baseline. I added an authored performance-driver bank, /sb/driver/* (schema climbed additively to v2.4, no address ever renamed) (04c036d, 43d509d), with impact, pump, swell-slope, rhythmic-density, drop, and palette-trust.
Now a visual consumes signals designed for visual control instead of re-interpreting raw audio.
LLR RedMech, same beat, before vs after the kick/sub fix. Once the low-end transient drove the visual correctly, the same moment reads as a punch instead of a wash.
Wiring only the trusted signals
Unity rewired to the bank, but only after an offline trust study. I wired the trusted signals, the kick and sub-bass carrying the most weight, then overall energy, hat impact, drop build/release and beat phase. I deliberately left the proven-shaky ones (snare, clap, voiced, chroma) unwired.
The Cycle-8 fixes paid off here. The beat is now correct (the ~4× tempo bug fixed (6b08ddb)), hi-hats are visible (a4a250f), and phantom drum hits are gone. The 3D cameras started moving to the music, FOV punching on the bass and jumping on the drop.
The deck maturing. Left: a mid-development preset, a flat 2D line-lattice. Right: where the kits landed, SpectrumMegastructure raking the audio spectrum into 3D architecture. That move from "a pattern on screen" to a structure with real depth is the gap between this and the flat 2D looks most VJ tools ship.Neon Highway at a drop. A still can't show this one, the camera and terrain respond to the beat as it moves.
Check
The hero-list audit
Based on Cycle 9's atlas verdict, I let the VJ's review set this cycle's agenda instead of my own taste. The hero list told me which visuals to harden, the fix/quarantine list which to repair or pull.
So the check came down to one question: did I actually deliver the heroes they marked?
When my tooling lied
That's where my own tooling failed me. One automated pass reported all three hero visuals "passing" while two were visibly broken.
After that I stopped trusting the metrics and reviewed off captures and motion strips instead.
What stayed deferred
The deferrals went into the log rather than getting buried. MonumentRed stayed grey after three tuning passes (a04277f), and SpectrumMegastructure's paleness traced back to an additive blend and got left for later. Nothing was faked green for a screenshot.
Alongside the VJ verdict, my partner's steer from earlier in the cycle, match the palette to the room's lighting, went into the colour work rather than getting filed away. The other note from the VJ side was about usability under pressure:
"Way too many presets right now. At eleven at night I'm not going to scroll a list. Give me a handful that actually work and get those properly right. And show me they hold up on different music, not just the one track they were built on."VJ, on the deck
Conclusion
This cycle turned the atlas review into a real deck: hardened heroes, a wider preset vocabulary, an authored driver bank wired only to the signals I trust, and colour work that answers the room's lighting. That ask, a small hero set shown to hold across genres, is what the next cycle had to deliver.
Cycle 11 · The reel, and what's still unproven
Cycle 11 · end-to-end proof + honest limits
Think
The question the reel had to answer
Cycle 10 left me a hero deck and the VJ's parting demand, show me it holds up on different music, not just the one track it was built on.
Why a screen recording wasn't enough
But I still hadn't recorded the whole chain reacting end to end, on any track. This cycle: the end-to-end reel, run across more than one kind of music, and an honest account of where the proof stops.
Make
Building the six-genre reactivity reel
I built a reactivity reel: each visual recorded reacting to six genres, composited into one mosaic on a single clock, with the live ShowBrain signals panel shown beside the grid.
The recording pipeline is locked to the real path:
an audio file out to BlackHole,
into ShowBrain,
into Unity over OSC,
screen-captured, and I rejected an OBS shortcut so that ShowBrain is enforced as the only analyzer in the demo,
and the masters are loudness-normalized so a quiet song and a loud one drive the visuals comparably.
One clock, the whole deck
This was also the first time the whole deck ran as one thing rather than a pile of separate presets: two dozen visuals on a single clock, each reacting to the same instant of the music.
You can watch the combined reel, or jump straight to Atonal Vanishing Point (#240), where the spotlight shows one visual reacting on its own next to a read-out of what each driver does to it.
The silent bridge bug
Getting the capture to actually bind the audio cost me most of a day. I'd inject a test signal and the visuals would just sit there, dead.
It turned out the host re-binds its own silent audio bridge every single frame, quietly stamping over whatever I'd injected, and my inject tool was writing to a different copy of the audio bus than the renderer actually reads. The fix was a capture path that clears the bridge and re-asserts the real bus every frame.
Obvious once I could see it, but nothing in the symptom, a visual that just sat there dead, pointed at a bind being silently overwritten every frame.
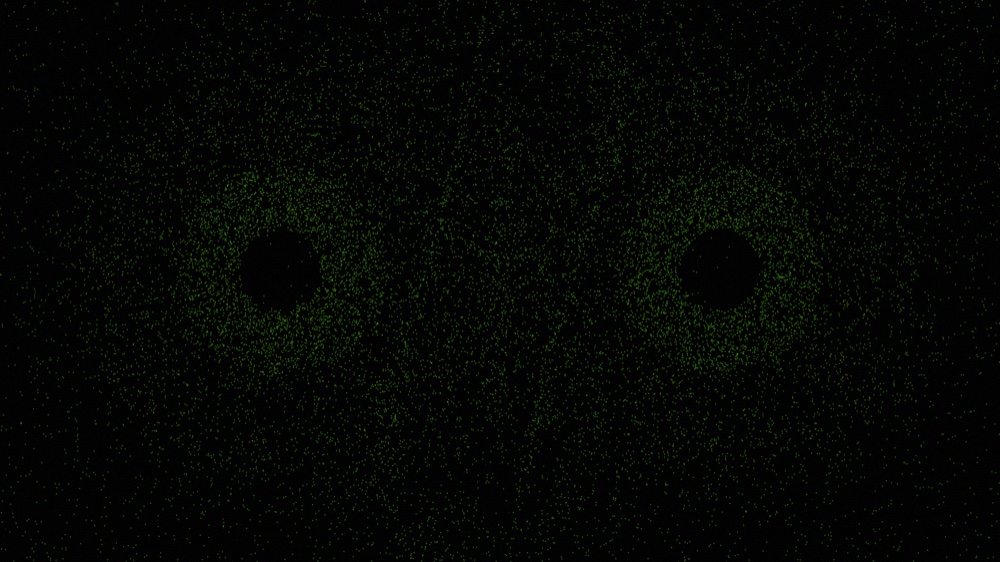
AshOrbit, the same preset in silence vs at the drop. When the music stops it goes dark; the drop erupts. The clearest controlled comparison in the project: the audio drives the visual, not a loop.BioFormDrift, baseline vs driven, side by side. Left, with no audio, the form is a small dim crystal; right, driven by the harmony signal, it blooms into a large faceted structure. The same preset at two audio levels, a controlled reactivity test, not a performance clip.
Check
What the reel proves, and what it doesn't
The driver bank is live and mapped, I verified that by injecting synthetic OSC and watching the right visuals move, and the silence-vs-drop captures show real reactivity across the deck.
But it's still me grading my own reel. My partner, watching it as someone who runs live sound, flagged the gap the reel was hiding, that a room's audio is nothing like a leveled file.
The room-audio gap
And when I showed it to a venue contact, the first question went straight past the visuals to exactly that:
"A reel's got clean, leveled audio. A room hasn't. What happens when it's too loud, or the bass is booming through the whole place, or the mic's set wrong? And half the time you can't even get a proper audio feed in or out of the laptop."venue contact, on the reel
Conclusion
A screen recording can't answer any of that: real projection, an LED wall, club lighting, haze, and live audio on accessible hardware. I couldn't grade it from my desk, so the next thing I did was take it to a room and run it off a live microphone.
Cycle 12 · The venue test, live mic, and the input that kept maxing out
Cycle 12 · the first real product test · late Jun 2026
Think
Why the file path wasn't enough
The reel ran on a clean, loudness-normalized file through BlackHole, and a real room won't hand me that. A hot venue and a live microphone are a different animal: the level drifts, the room rumbles, and nobody's babysitting the gain.
I already knew loudness was the enemy here. On the file side I'd watched the on-the-wire spectrum hard-clamp loud low-end into a flat "maxed-out" wall and fixed it (0a31853), and the input-conditioning stage had existed for weeks (5779417).
What I hadn't done was prove any of it survived a live mic. It turned out live-mic reactivity is a lot harder than the file path, so I had to test it off an actual microphone in an actual room.
The Jungle Amsterdam test
So I took it to Jungle Amsterdam. The real finding, before anything else, was blunt: the mic turned out to be far too sensitive, and the input kept maxing out.
High room noise pushed the input against the wall, and the capture was not clean until it was hand-tuned to the room. That's the headline.
Make, the conditioning, dialled to the room
The conditioning chain in front of the analyzer was already built; the live mic is what forced me to tune it properly, and to add the one piece still missing, an adaptive normalizer on the wire:
A per-band adaptive normalizer on the spectrum that goes out over OSC, the direct fix for the "grid maxed out" hard-clip (3e30c53, 0a31853). Crucially the named bands (kick, sub, bass…) are left un-normalized, because those drive loudness-sensitive reactivity: you normalize what's displayed, not what drives.
A noise gate and a high-pass filter, plus an input-gain control. These ship effectively off, gate at −80 dBFS, HPF bypassed, so the live mic is where the real values came from: gate −45 dBFS, HPF 40 Hz, tuned against a MacBook Pro mic so silence reads ~0 (no phantom kick/sub/bass) while music, well above −45 dBFS, stays fully reactive.
All of it runtime-settable, /sb/config/noise_gate_db, /sb/config/hpf_hz, and a /sb/calibrate/start … stop routine, so an operator can re-tune to a room in seconds, and the AudioBrain Probe's gain → HPF → gate chain makes the conditioning visible while they do it.
The core of that normalizer is only a few lines. Each band is mapped into its own recent range instead of a blanket clamp(0.0, 1.0), so a steady band lands at 0.5, a band louder than its own norm rises, and a quiet one falls:
// band_normalize.rs, the fix for the "grid maxed out" hard-clip.
// Map each band into ITS OWN recent dB range, not a blanket clamp,
// so no band pins at the ceiling and quiet bands aren't crushed flat.
fn map_db(&self, b: usize, l: f32) -> f32 {
    let mean   = self.mean_db[b];                      // slow EMA baseline (mu)
    let spread = self.spread_db[b].max(self.cfg.min_spread_db); // EMA dev, floored
    let lo = mean - self.cfg.range_low_sigmas  * spread;
    let hi = mean + self.cfg.range_high_sigmas * spread;
    ((l - lo) / (hi - lo).max(EPS)).clamp(0.0, 1.0)    // steady -> 0.5; louder rises
}
For a file you just loudness-normalize the masters. A live mic is more work: you gate it, high-pass it, adaptively normalize the spectrum, and give the operator a calibrate button. The raw level drives the visuals linearly, and a room hands you a level you didn't plan for.
Check, what the live mic actually proved
The live mic run
I ran the mic test with my partner on hand for the live-sound side, watching the gain and the room against what the analyzer was reporting. What it confirmed is narrower than "venue-proven."
It validated the chain end-to-end on a live MacBook Pro mic: ShowBrain mic → OSC → the Unity bridge, messages climbing. With the gate at −45 dBFS and a 40 Hz high-pass, silence read ~0, no phantom kick or sub from room noise, while music stayed reactive.
The best sign it worked wasn't on my laptop, though. Someone standing near the screen caught it mid-song:
"Wait, is that reacting to the music? It's actually following the bassline."at the demo
That one line off the floor did more for me than any capture I'd graded at my desk, and it only shows up when the low end is really driving the visual, not a loop playing underneath.
What one room still can't prove
The scope is one mic, one room, tuned by hand. A louder PA, a different microphone, or a bassier room will need the calibrate routine again.
And I still haven't put the autonomous output next to a plain loop pack or a human VJ in front of a crowd. The test didn't prove "it works in a venue." What it changed is narrower: the loudness problem I'd only ever solved for files now has a live-mic answer, one I've run exactly once.
Conclusion
Hand-tuned to a single room, run exactly once. The show in front of a crowd is still to earn.
Where this is going: two modes, cheap hardware, honest gaps
the product, as it actually stands
Splitting the audio brain out of the renderer and sending Unity's output over Spout was always about serving two different customers with one system. Most venues don't want a VJ; they want to turn it on. That's the autonomous path, Unity drives the screen directly, ShowBrain picks and drives visuals to the music, and a watchable first frame is meant to arrive with no clicks. The VJs want the opposite: control. For them the same output goes over Spout or Syphon into Resolume, where they composite, layer and remix it live. One brain, one deck; whether a human is driving is the only thing that changes.
And it has to run on hardware a small venue will actually buy. The reactor holds 60 fps at 1080p on my Apple M2 Max laptop; a dedicated venue box is a cheap-ish Windows machine, an RTX 4060 8GB at the low end, an RTX 5060 Ti 16GB for a "don't think about it" build, not the pro rendering rig the festival tools assume. ShowBrain itself is CPU-only: a couple of cores, about 150 MB. The barrier to trying it is meant to be far lower than a dedicated VJ plus a pro rendering rig.
What's proven, and what isn't
Proven
The whole chain reacts end-to-end, audio → ShowBrain → OSC → Unity, verified by injecting synthetic OSC and by the silence-vs-drop captures.
The authored driver bank is live and mapped, and after the Cycle-8 fixes the beat, kick and hats are trustworthy enough to drive the visuals in this prototype.
The VJ atlas review's hero / quarantine verdict was executed into a coherent deck.
A live mic worked once it was conditioned, on a MacBook Pro mic in one room, tuned by hand.
It held 60 fps at 1080p on an M2 Max in my setup, though GPU headroom is unmeasured (see right).
Not proven yet
Real GPU headroom. My performance gate was timing the CPU only, frame-timing stats were switched off, so it read a comfortable green while I had no real measurement of the thing that actually bottlenecks a visual system.
More than one room. A louder PA, a different mic, or a bassier room needs the calibrate routine again.
Against the alternatives. I haven't put the autonomous output next to a plain loop pack, or a human VJ, in front of a crowd.
Projection at scale. LED walls, haze, camera feedback. I tried to auto-detect the projector-into-camera feedback loop and gave up: in a real venue the output is already tinted toward the camera, so a detector can't tell a real loop from normal tinting. It ships with a manual "hold" cut instead.
Camera colour-matching. Sampling a room's lighting from a booth camera works on my own setup, but I've never pointed it at a real venue's stage lighting or haze, so the colour it picks in a room that isn't mine is still unproven.
Two engines, one term. The visual engine (VisualsVJCombo, 804 commits) and the audio brain (ShowBrain, 273 commits) advanced in lockstep from spring into summer, which is why this write-up keeps them together instead of splitting them apart.
What the seven Unity + ShowBrain cycles taught me
A few things stuck, and mostly not the ones I expected. Almost every real problem showed up in a check, not in my head, so I learned to test earlier than felt comfortable. Fewer signals I could trust beat a pile I couldn't, and the ones that actually carry a room turned out to be the kick and the sub-bass, if the low end is honest and driving the picture it reads as reactive, and if it isn't, no amount of mid-range detail covers for it.
One deck a crowd reads as a single show beats seventy presets that all blur together. I stopped trusting my own green checkmarks after an automated pass called two broken visuals "passing" while a CPU-only perf gate sat comfortable measuring the wrong thing. And the sharpest steers came from people who run rooms for a living, one working VJ, or my partner on live sound, saved me weeks of guessing.
Next steps, summer 2026
The first crowd test is already booked: a Tekno party at Poppodium Max in Alphen aan den Rijn on 18 July, the first time this runs in front of an actual crowd instead of my desk. Everything else is timed around that night. Before it I want the GPU measured properly, frame-timing switched back on and the heavy presets profiled on the target RTX box rather than the CPU on my laptop, and the geometry heroes up on a real LED wall to find out which ones moiré and strobe once they leave the screen.
The room will lean on the audio harder than my first mic test did, a louder PA and more bass, so the calibrate routine gets another run on the same kick and sub-bass conditioning. And the comparison I still owe only really happens with a crowd there to judge it: the autonomous output next to a plain loop pack, and next to a human VJ. Under all of it, the two-mode packaging needs tightening, so a venue can just switch it on and a VJ can pull the same deck into Resolume without a ritual.
None of that is buried, because it's the honest state of a student project that turned into a product question. It reacts to audio in controlled tests and in one live-mic room. The show, in front of a crowd and against real alternatives, is what's left to earn.
The final result
See the deck actually react
Stills can't prove reactivity. The reel runs 24 of the current visuals against six genres on one clock, with the live ShowBrain signals beside the grid, so you can watch the audio drive the picture instead of taking my word for it.